
How to Build an eCommerce Store in NextJS, TypeScript, Tailwind, and OneEntry CMS 🛒👨💻


Introduction
This is a partnership article that is sponsored by OneEntry CMS.
Building an eCommerce application is often a challenging task. With so many alternatives available, it's not easy to pick a tech stack that fits the project's requirements, scalability needs, and long-term sustainability.
Another crucial point is that eCommerce projects deal with lots of data and CRUD operations. Creating a solid, scalable, and secure backend system can take a lot of time even for most experienced developers.
I've picked a tech stack that is based on NextJS, TypeScript, Tailwind CSS, and OneEntry CMS. We will build a practical eCommerce project ourselves to see how it works together and how it could be used to simplify content management.
The code for this project will be available in the GitHub repository.
The choice of tech stack
NextJS is a React framework for building fast and efficient web applications, that comes with features such as client and server rendering, data fetching, route handlers, middleware, built-in optimizations, and a lot more.
TypeScript adds static typing to JavaScript which makes it easier to catch and fix errors for scalable projects like eCommerce. It also boosts productivity via features like autocompletion and refactoring assistance.
Tailwind CSS accelerates the styling part of the web apps, allowing developers to style the elements within the markup without the need to switch between external CSS files and come up with the class names for each.
OneEntry CMS is a headless content management system with an easy-to-use interface, easily scaled backend, fast API, and clear documentation to boost your productivity for website content creation and management experience.
Content and design
The landing page will display the heading title, list the features of the shop, and include the hero image.

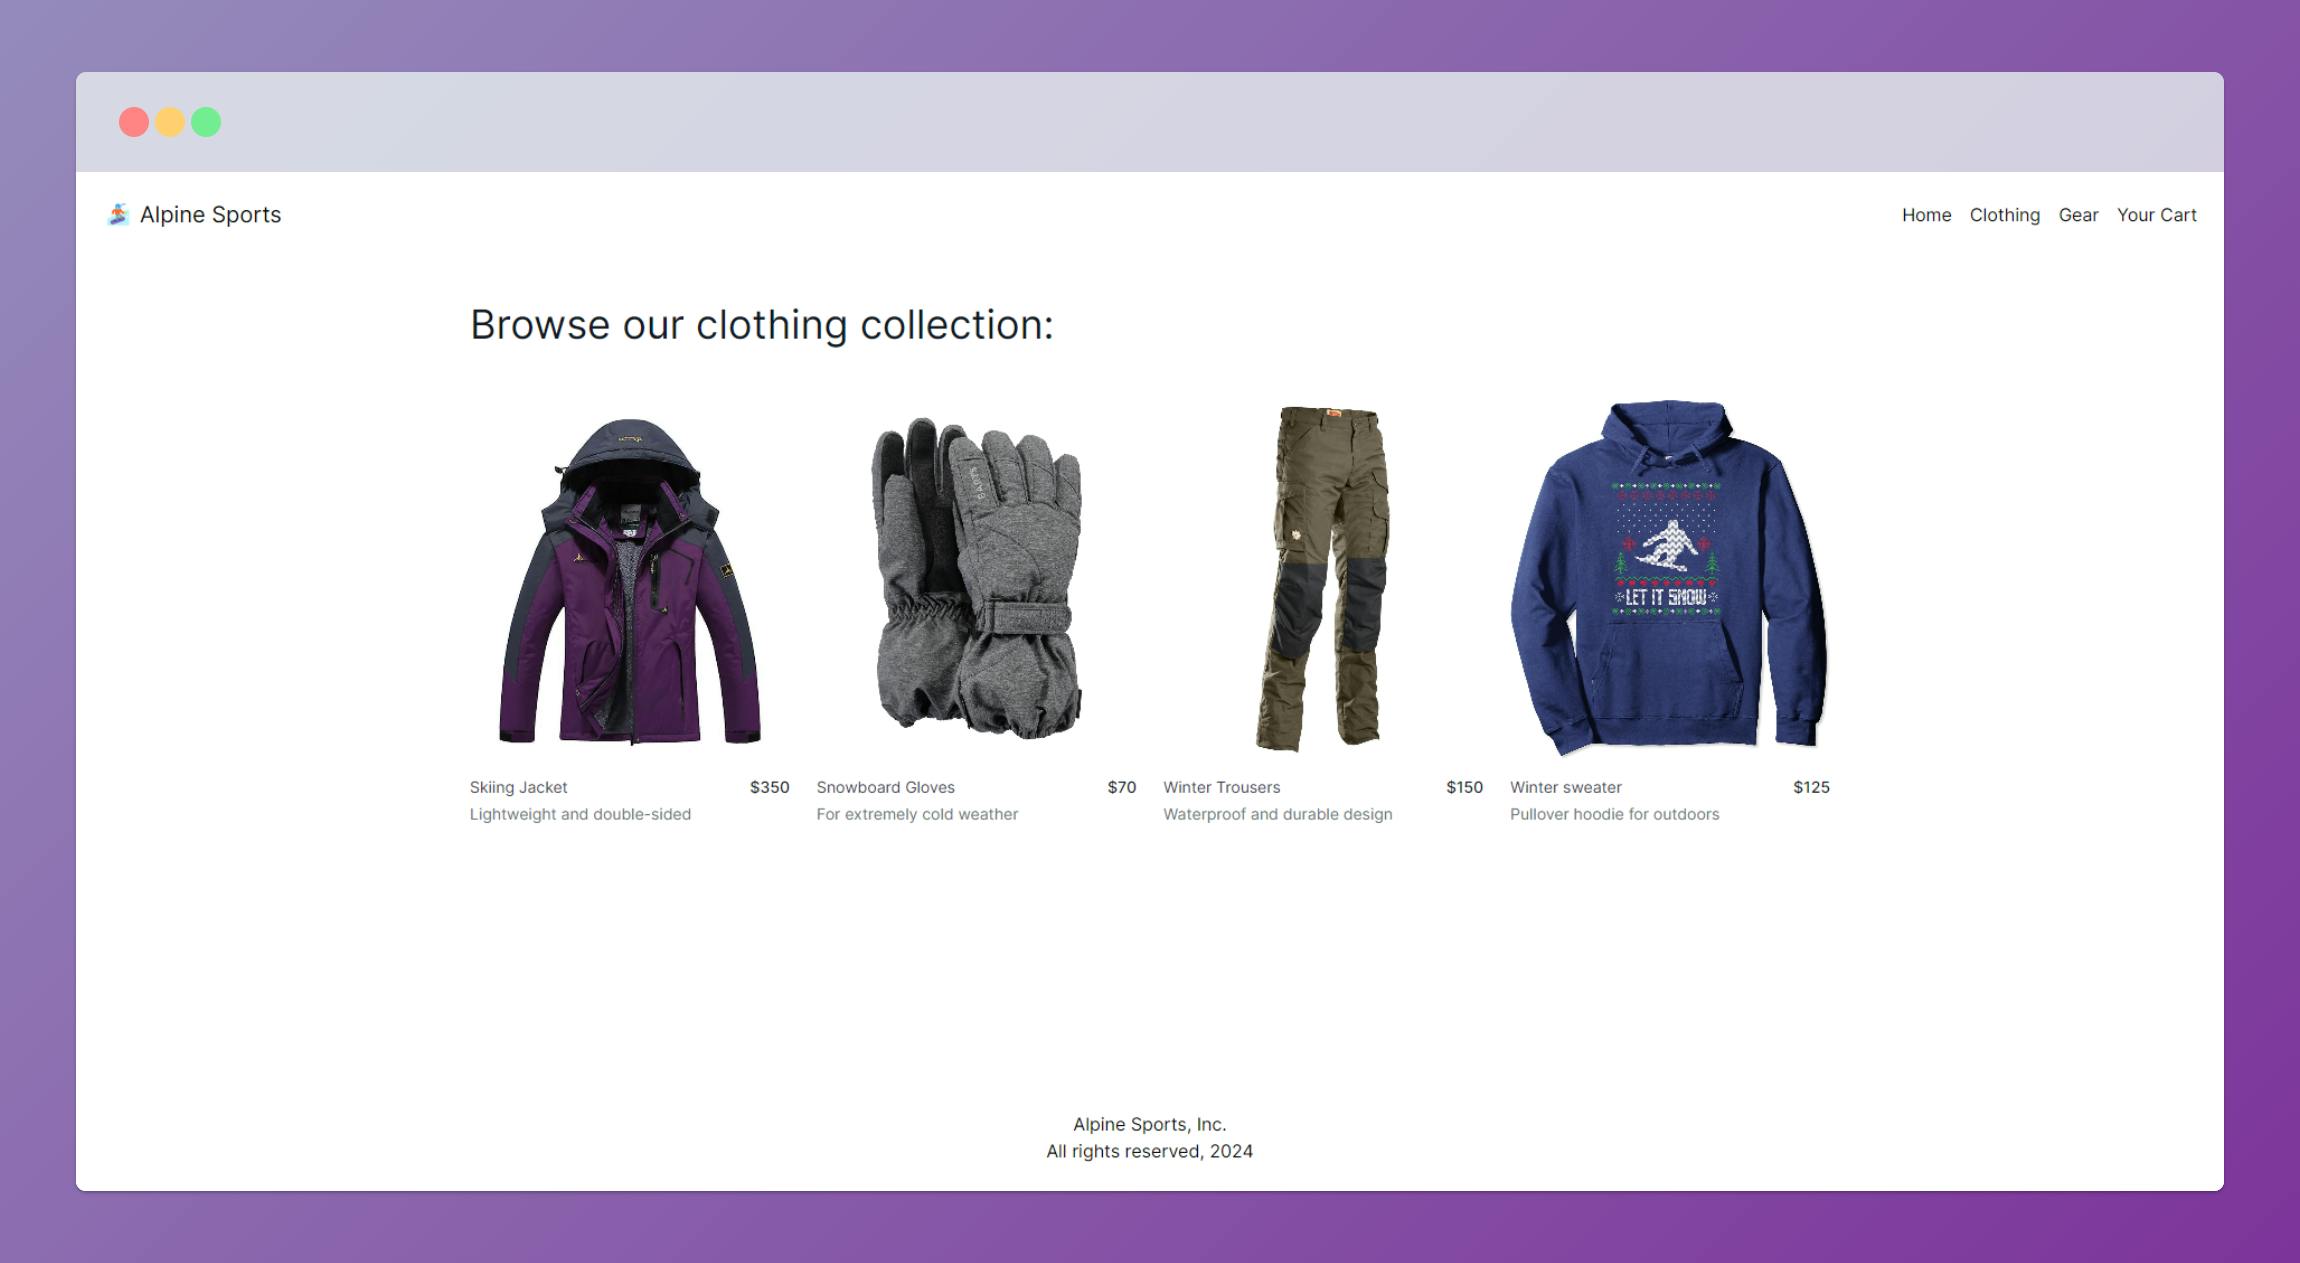
The first shop section will be dedicated to the Clothing.
The second shop section will include the Gear.

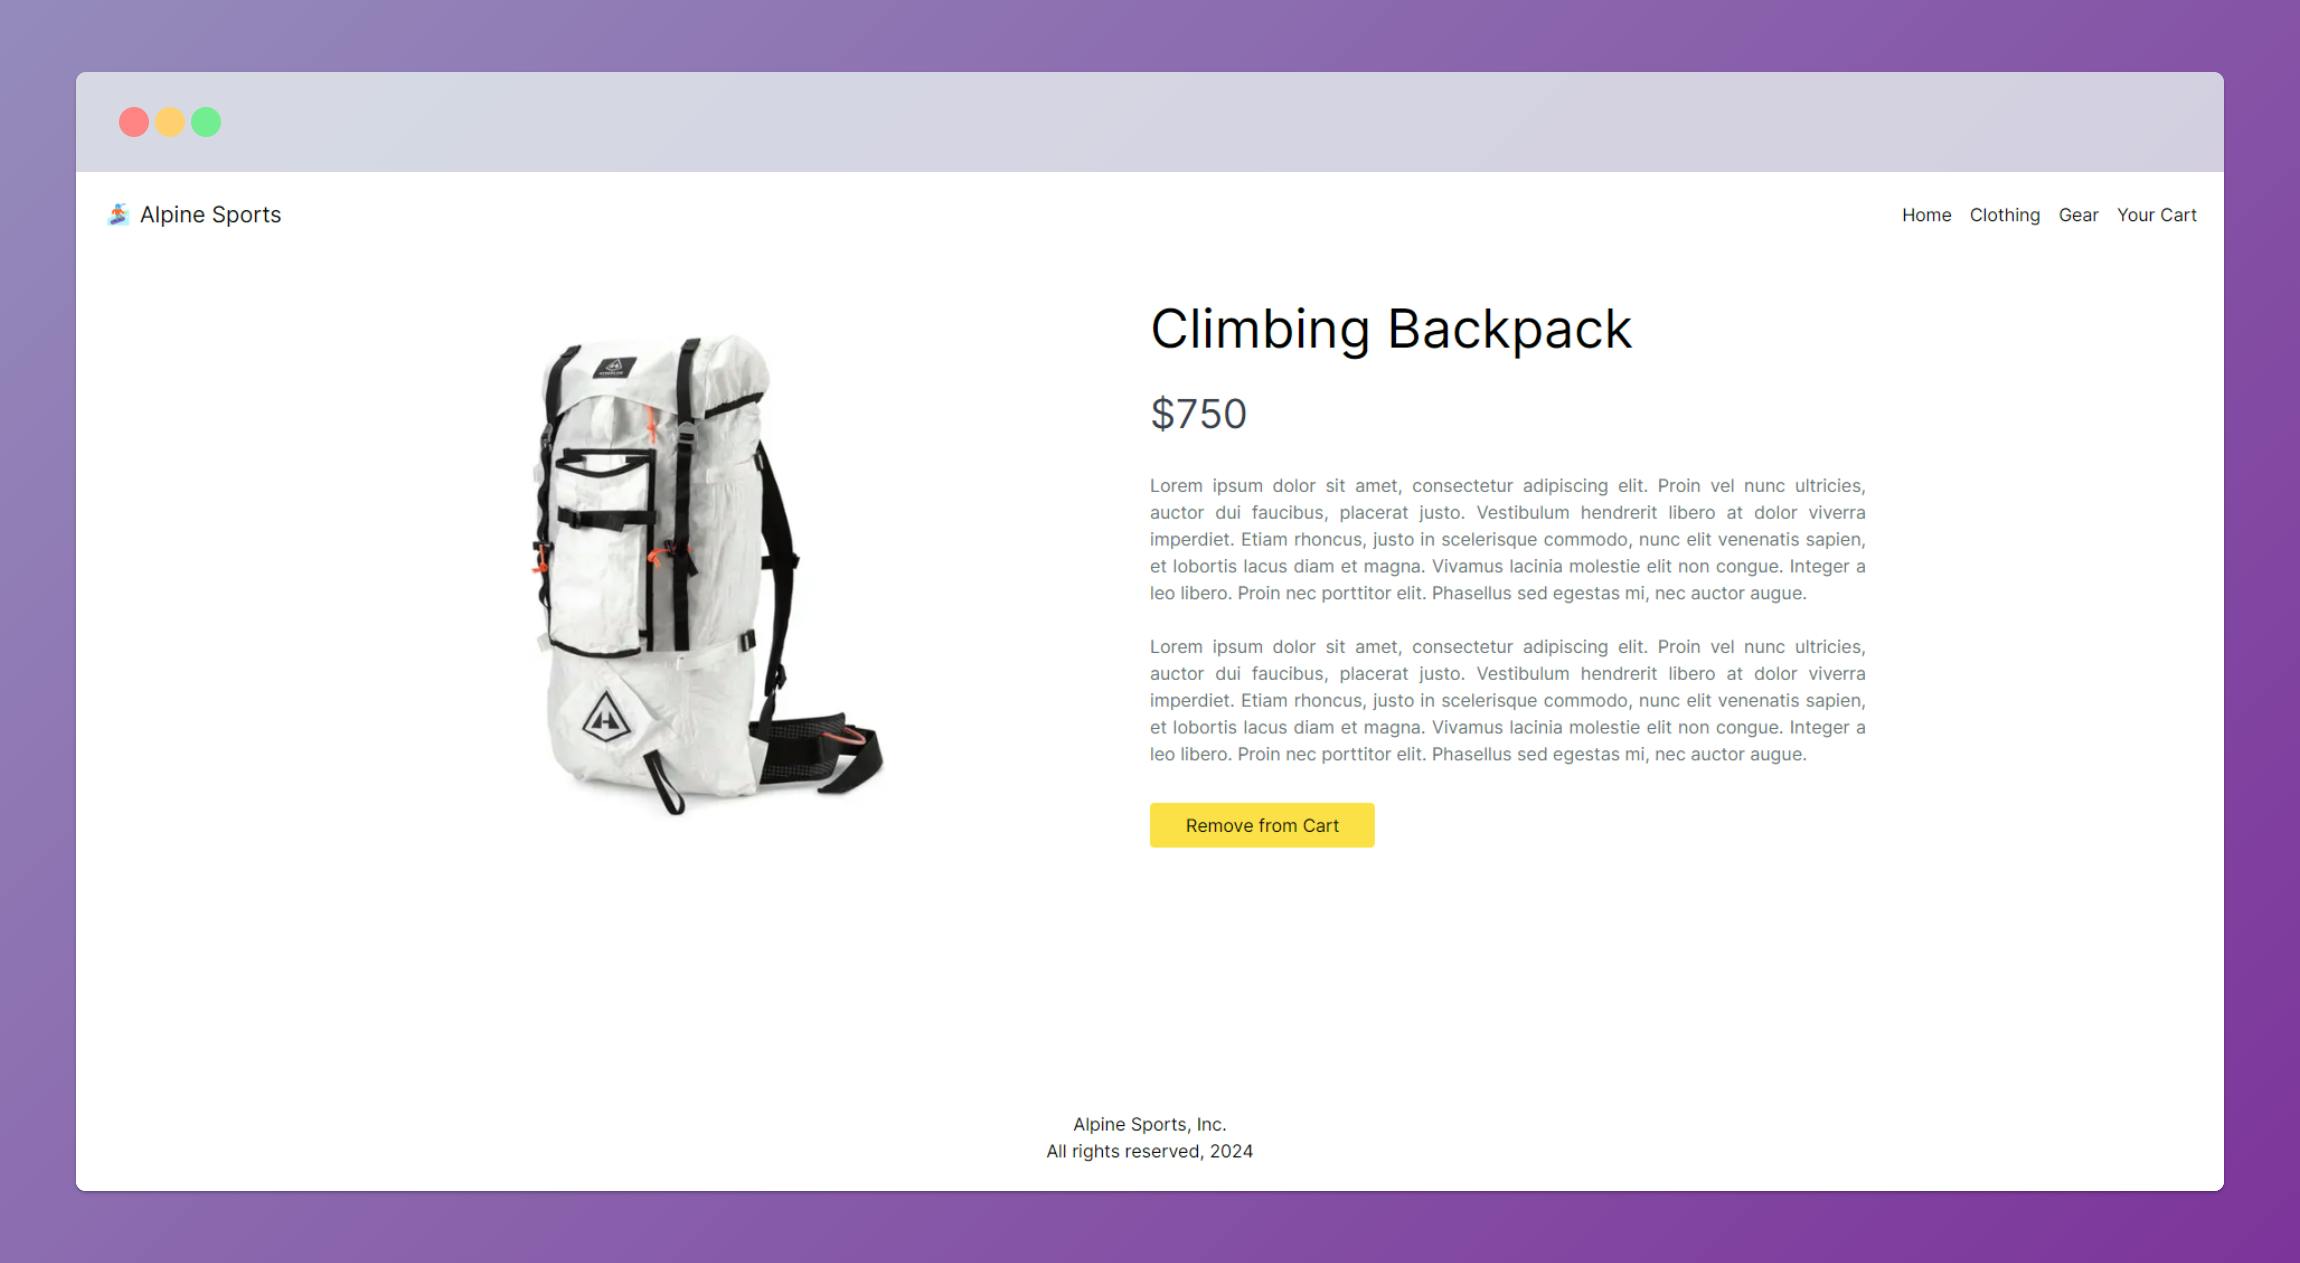
Each of the items will have an individual Preview page with details.

Items already in the cart will have an option to remove them.
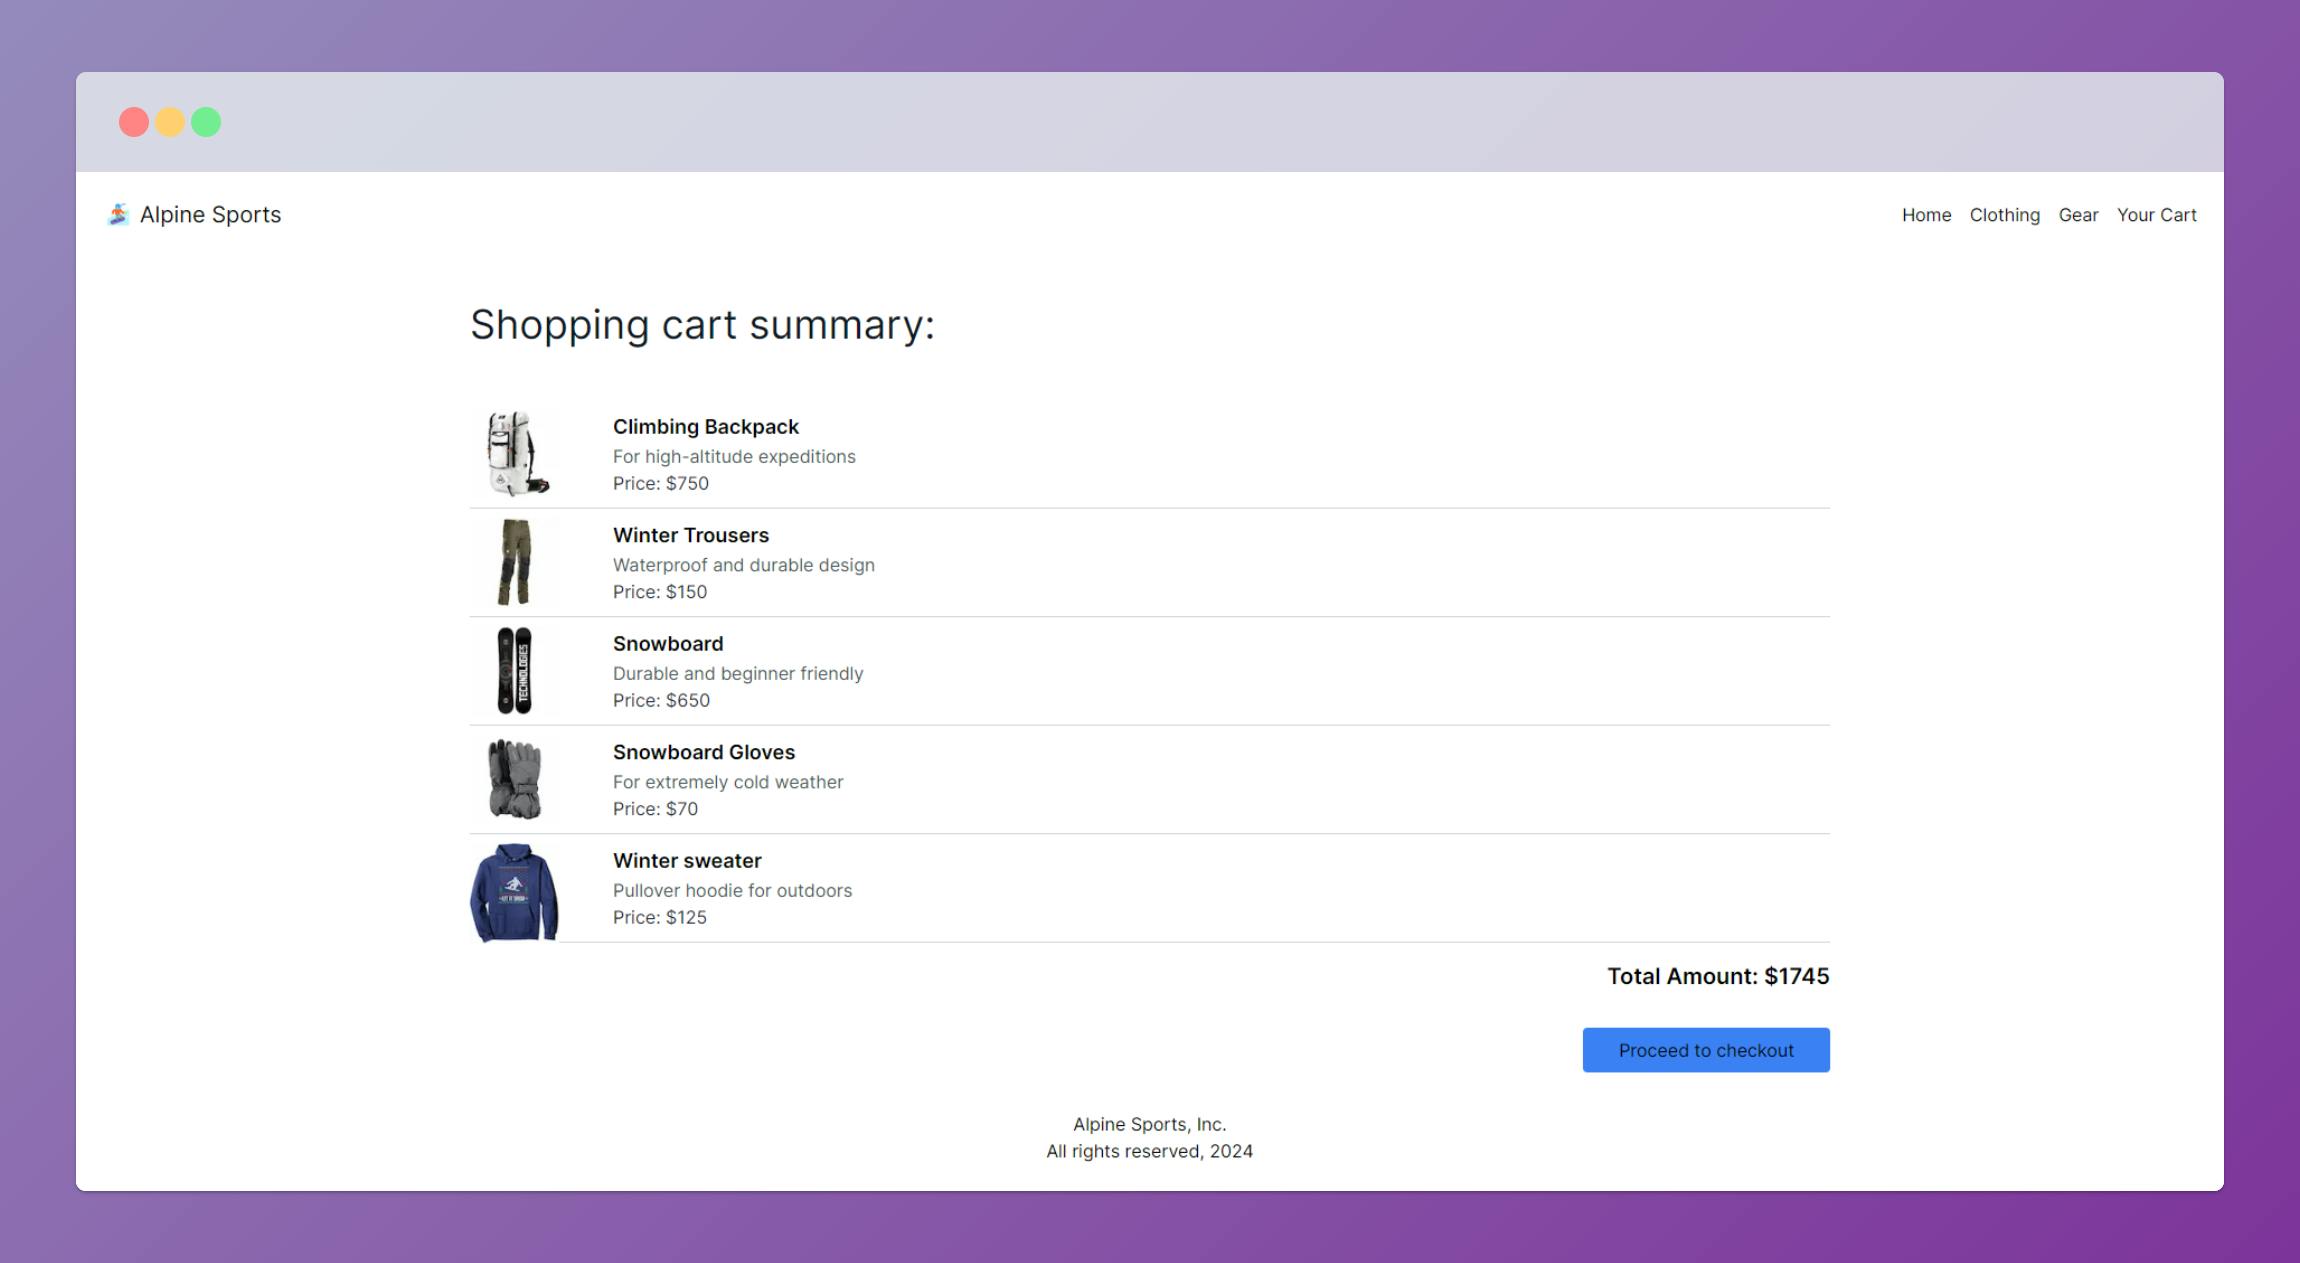
The cart will list all the selected items and calculate the total.
Create OneEntry Project
First, the user will need to sign up for a new account. To do that navigate to the OneEntry homepage and sign up via your email account.
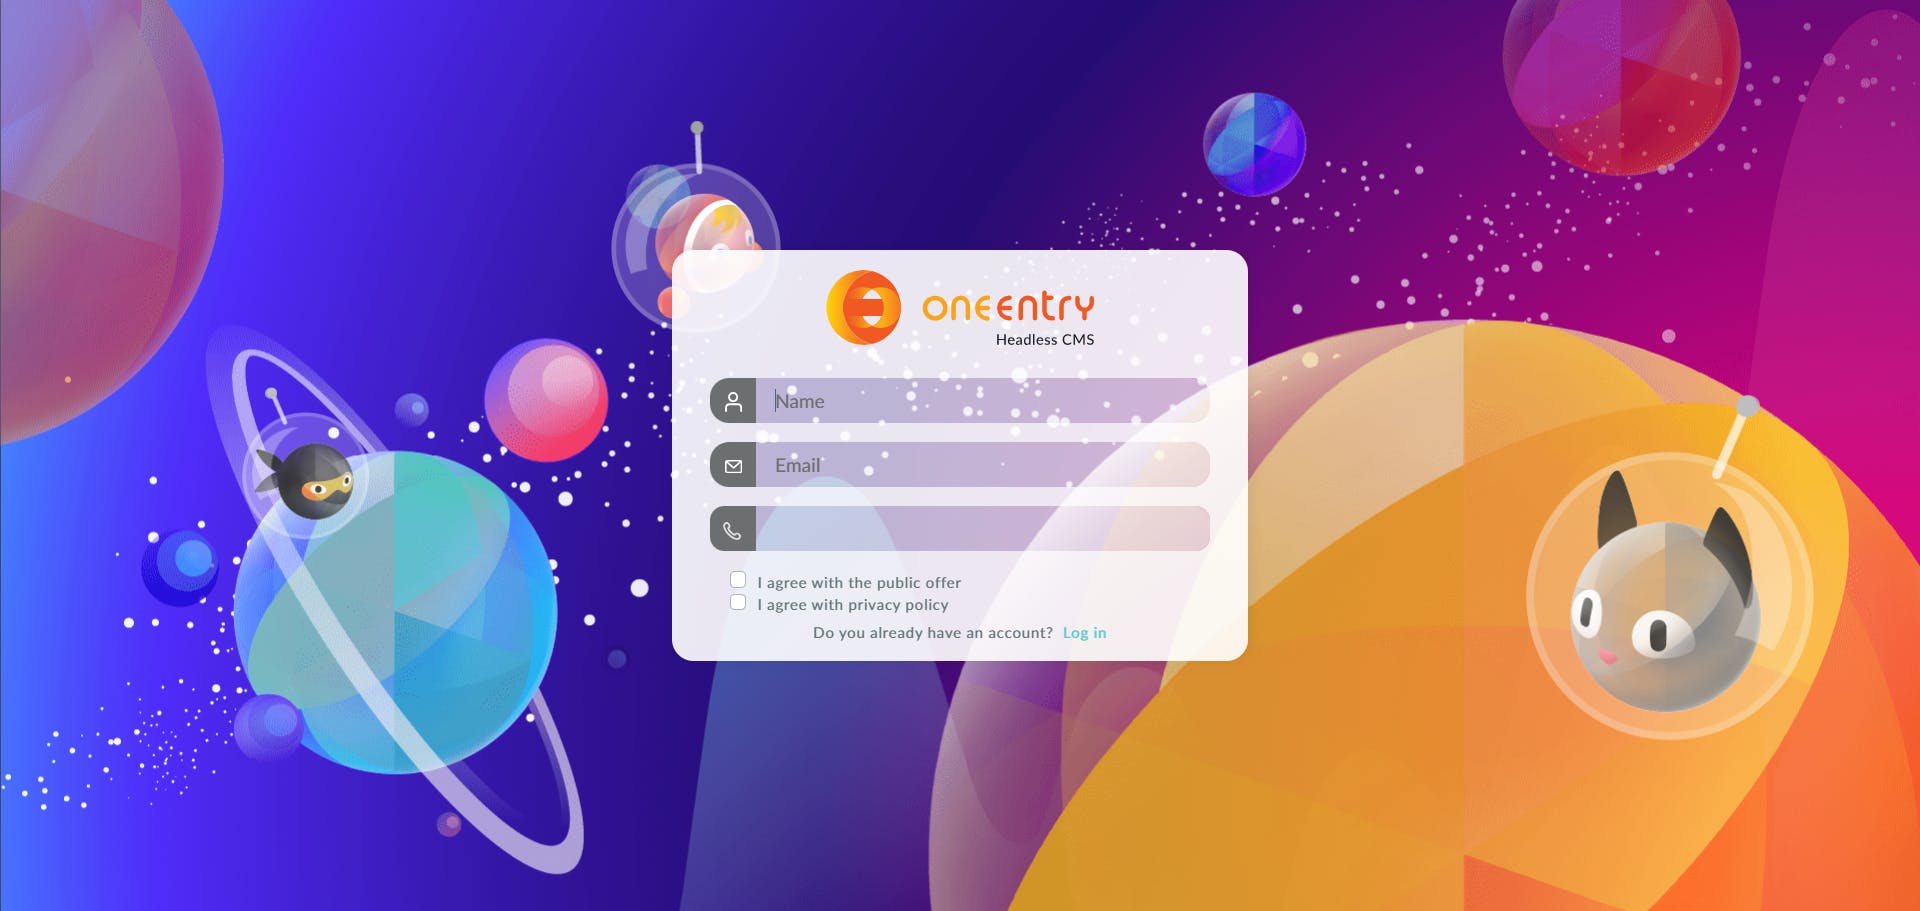
After that, log in and you will be directed to the OneEntry dashboard.
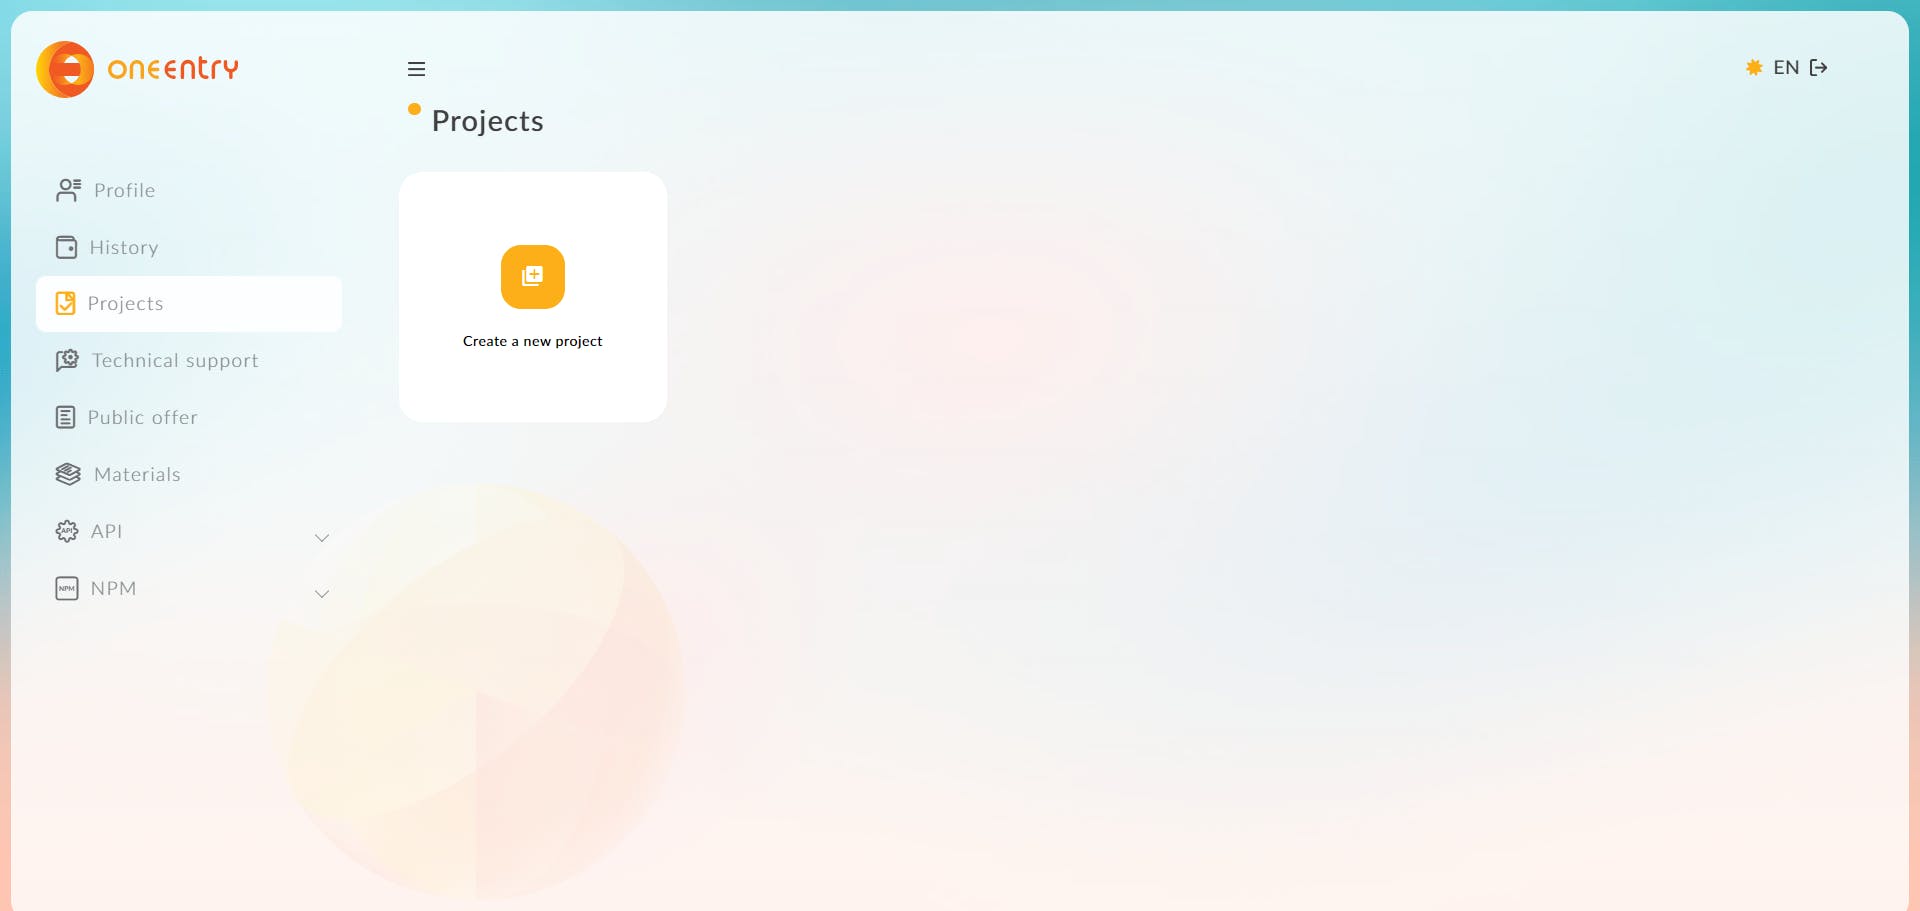
Start by creating a new project.
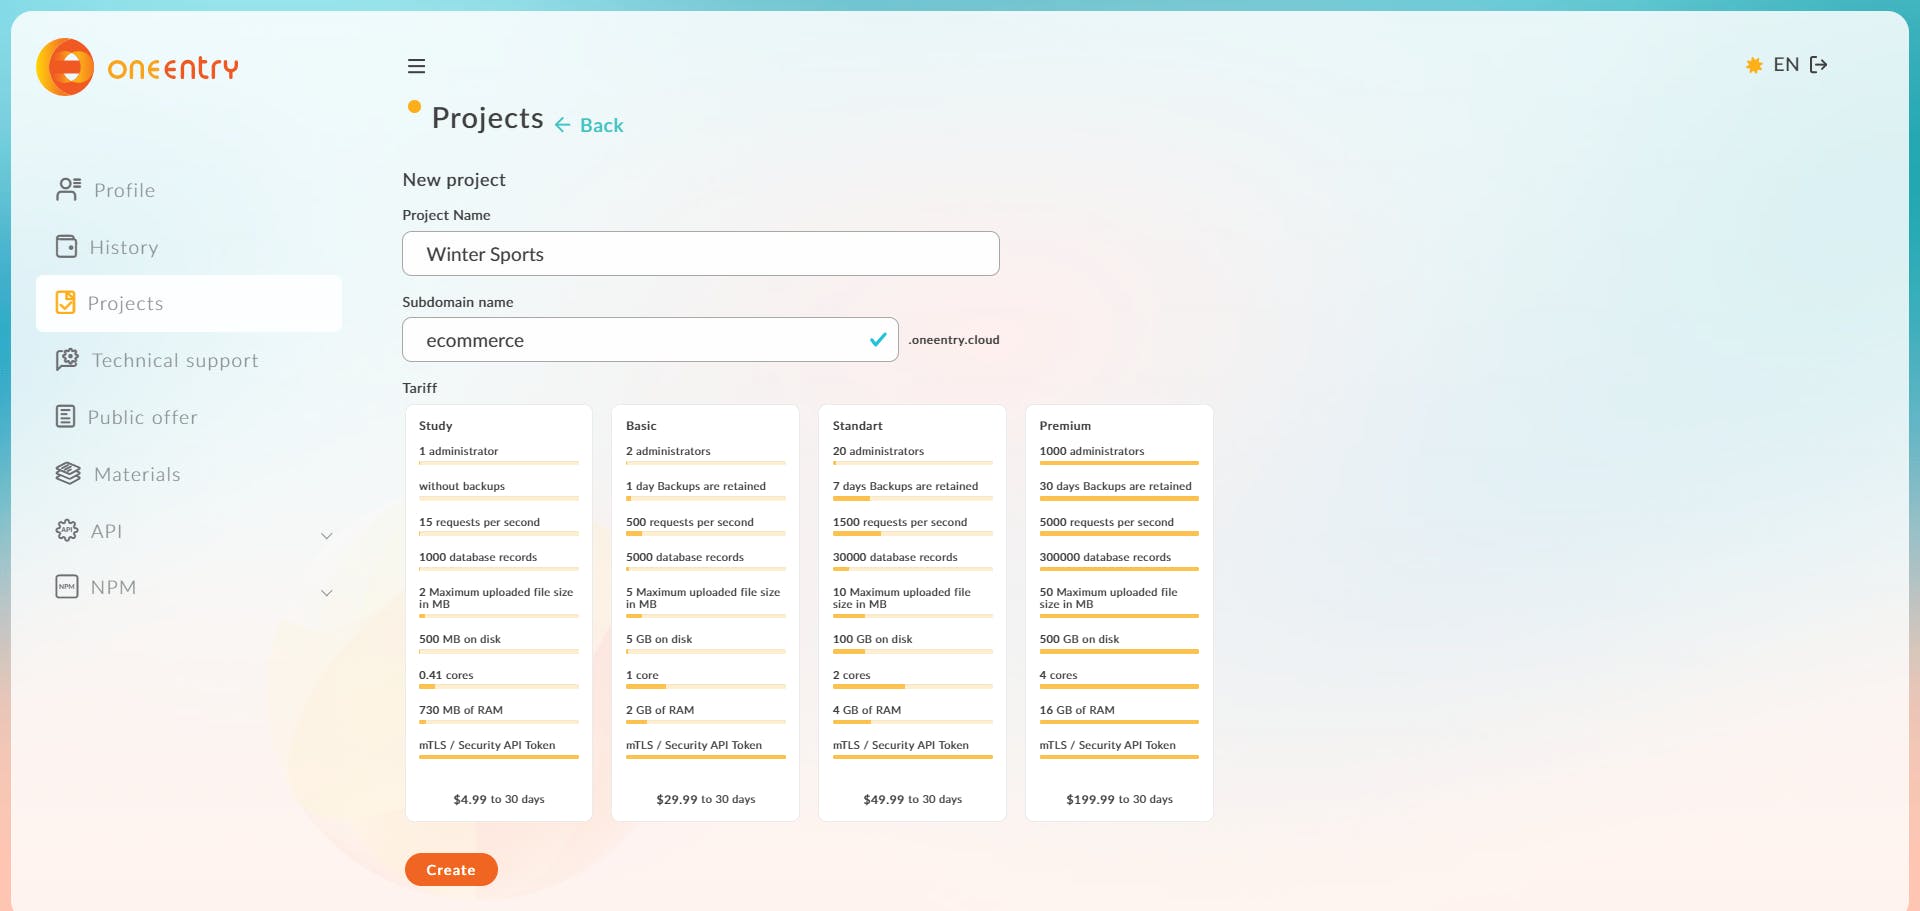
You will receive the free code to use the Study plan for a month. You will have a chance to activate it during the creation process of the project.
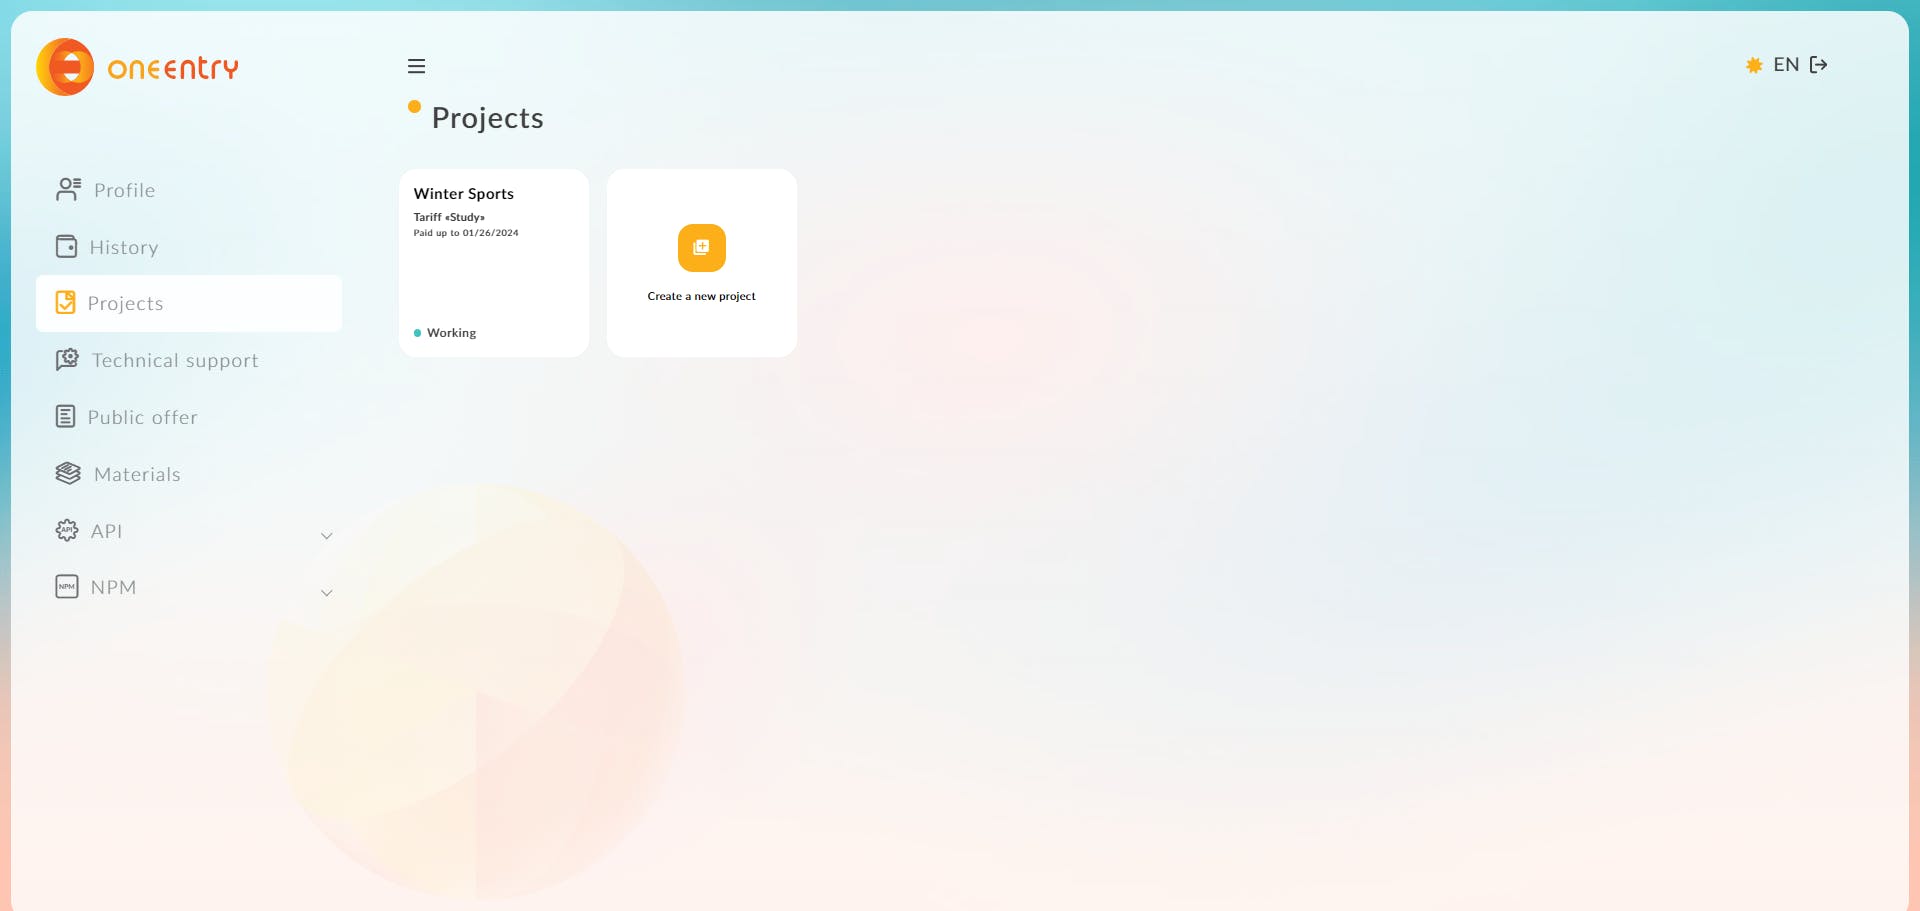
Creation of the project will take a few minutes. Once it is ready, the project status will change to "Working" and the status indicator will be green.
Creating the pages
After the project is created you will receive an email with login details to access your CMS portal to create and store the data for the app.

After the login, you will be able to create your first page.
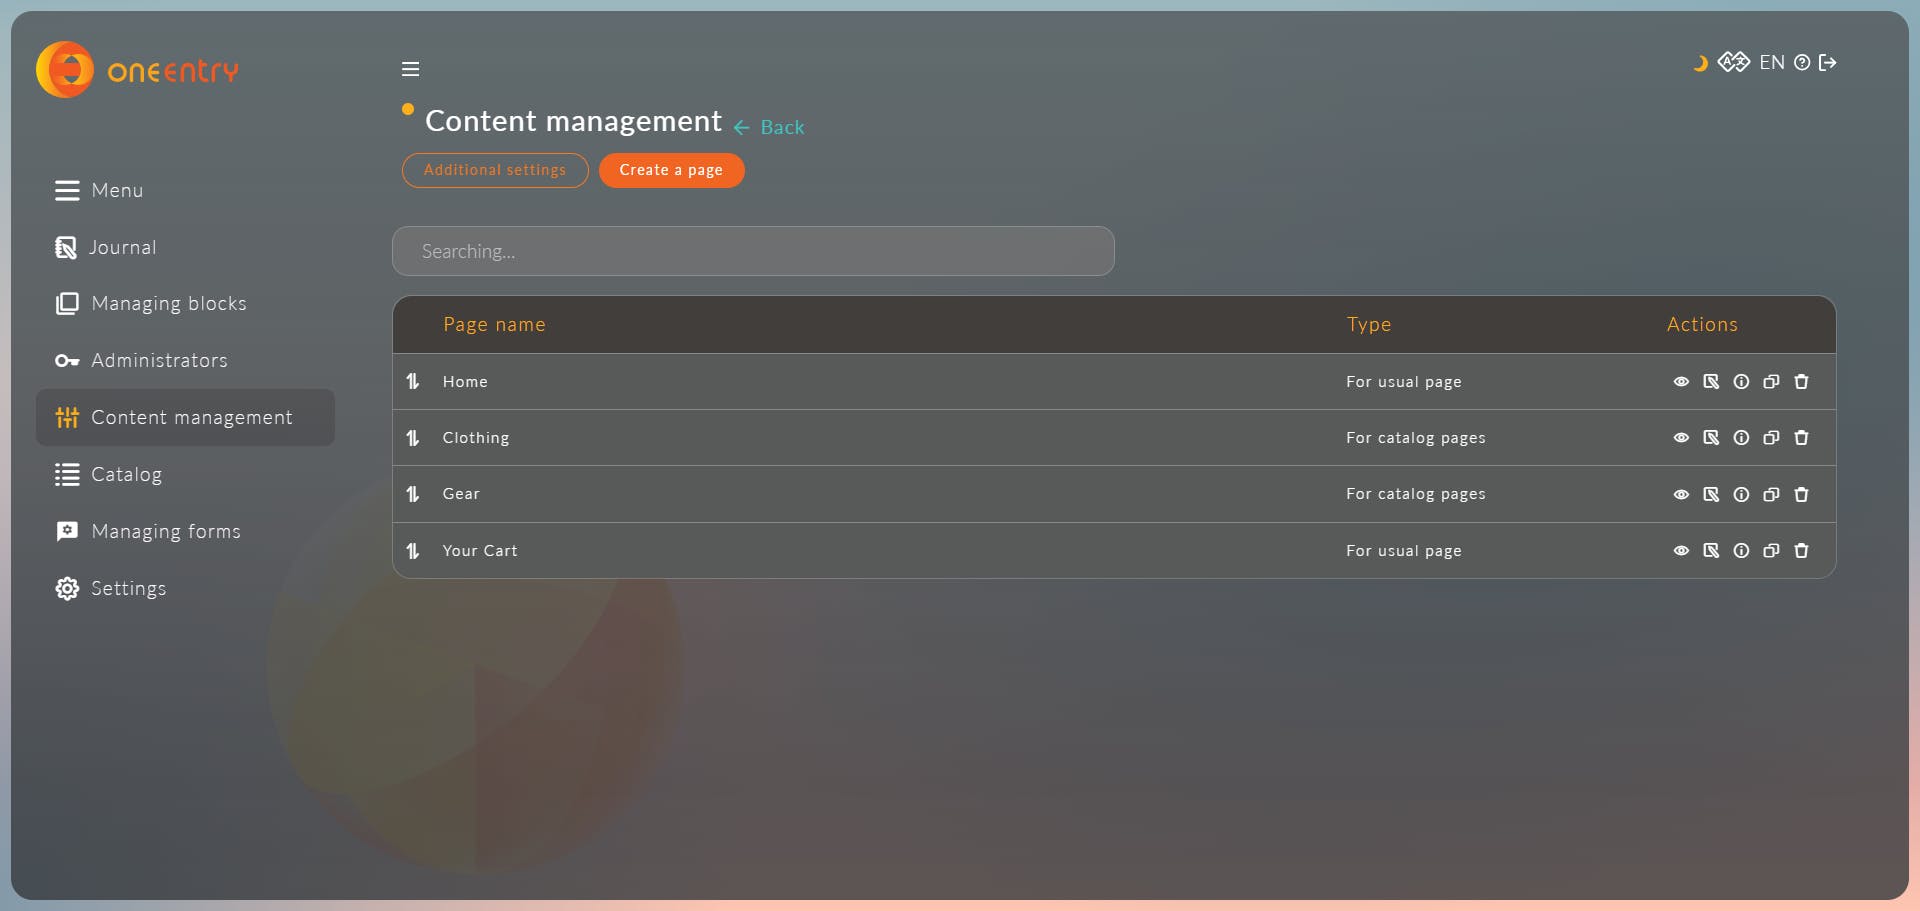
Navigate to Content Management, click on Create a new page, and fill in all the data required - types of pages, page title, page ULR, and name of the menu item.
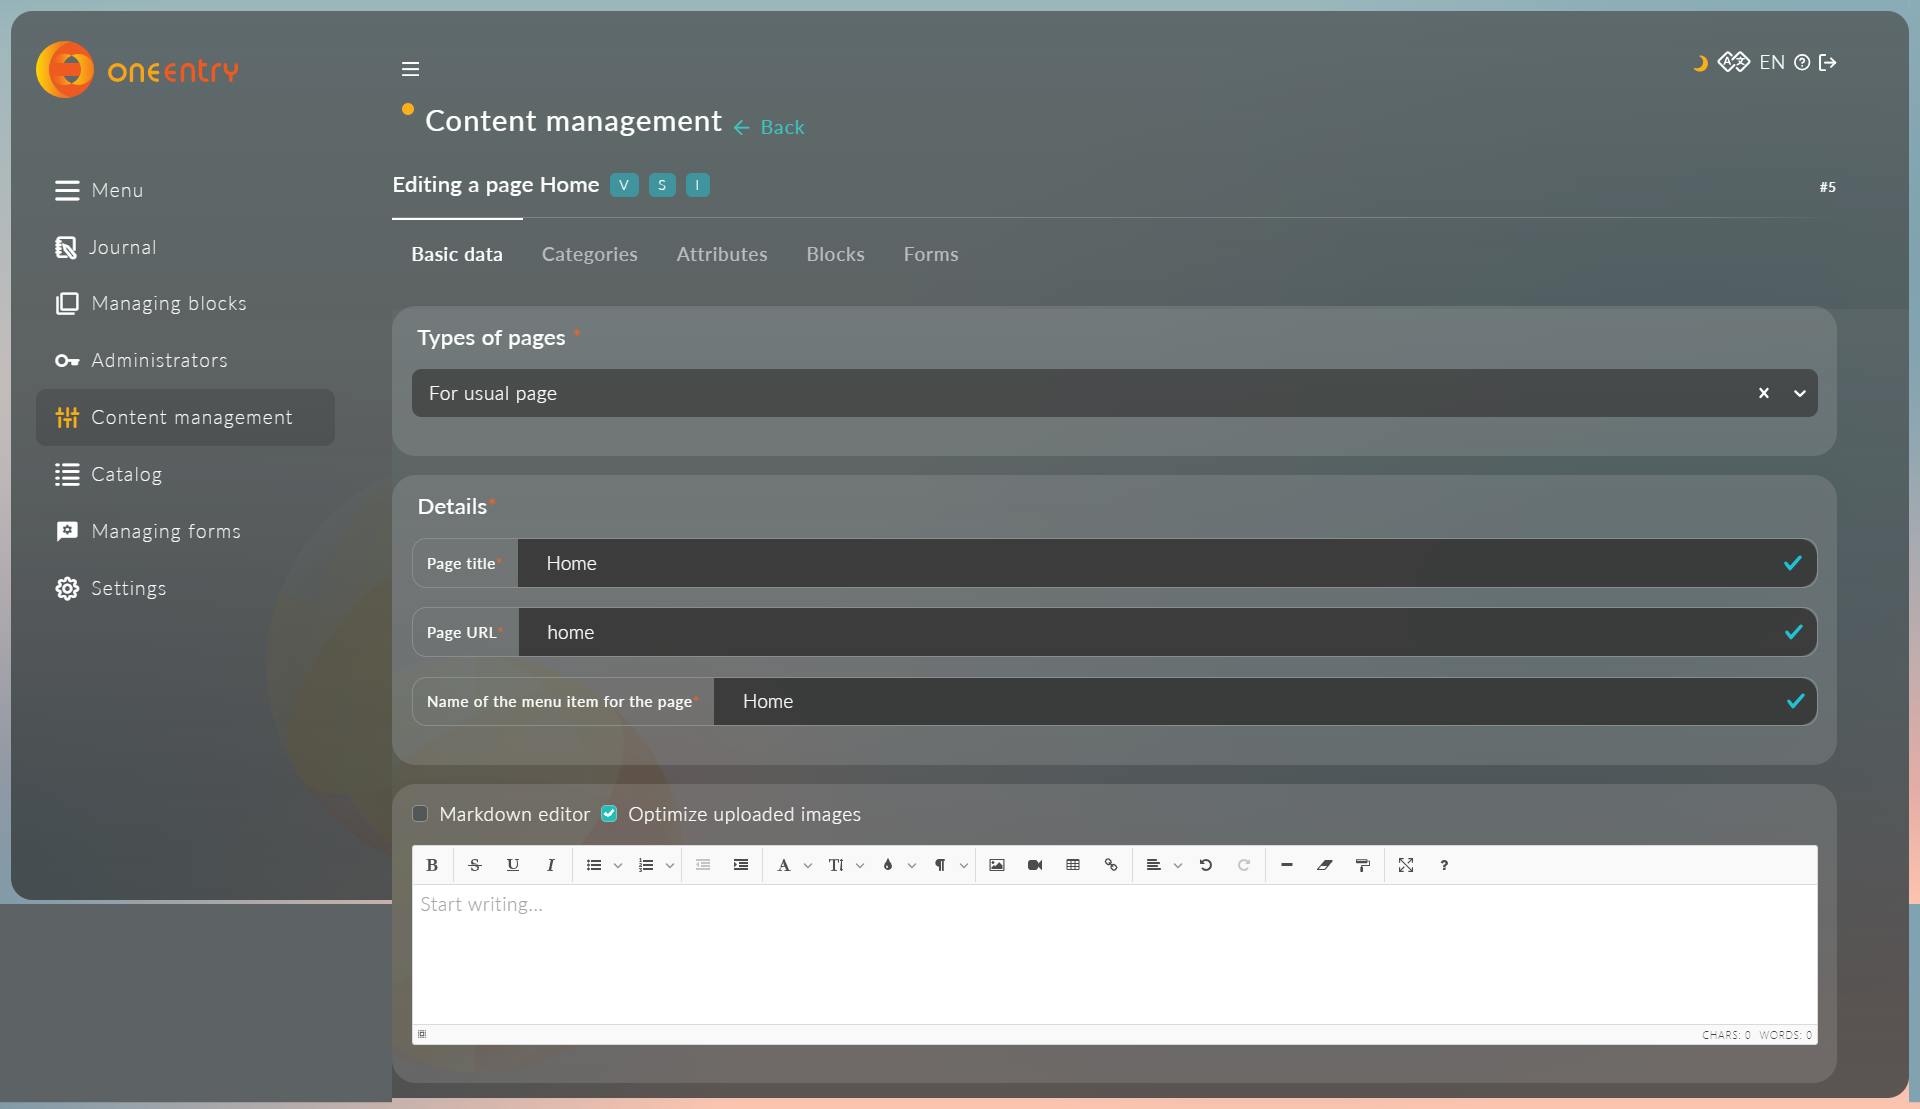
All the data is automatically saved upon entering.
Create 4 different pages for Home, Clothing, Gear, and Cart. Once created, the pages should look like in the screenshot below.
Create attributes
Next, we need to create the data structure we will store. In OneEntry CMS it is achieved by creating the attributes for the data.
Navigate to Settings and choose Attributes in the horizontal menu. Create an attribute set for the Home page providing the name, marker and type:
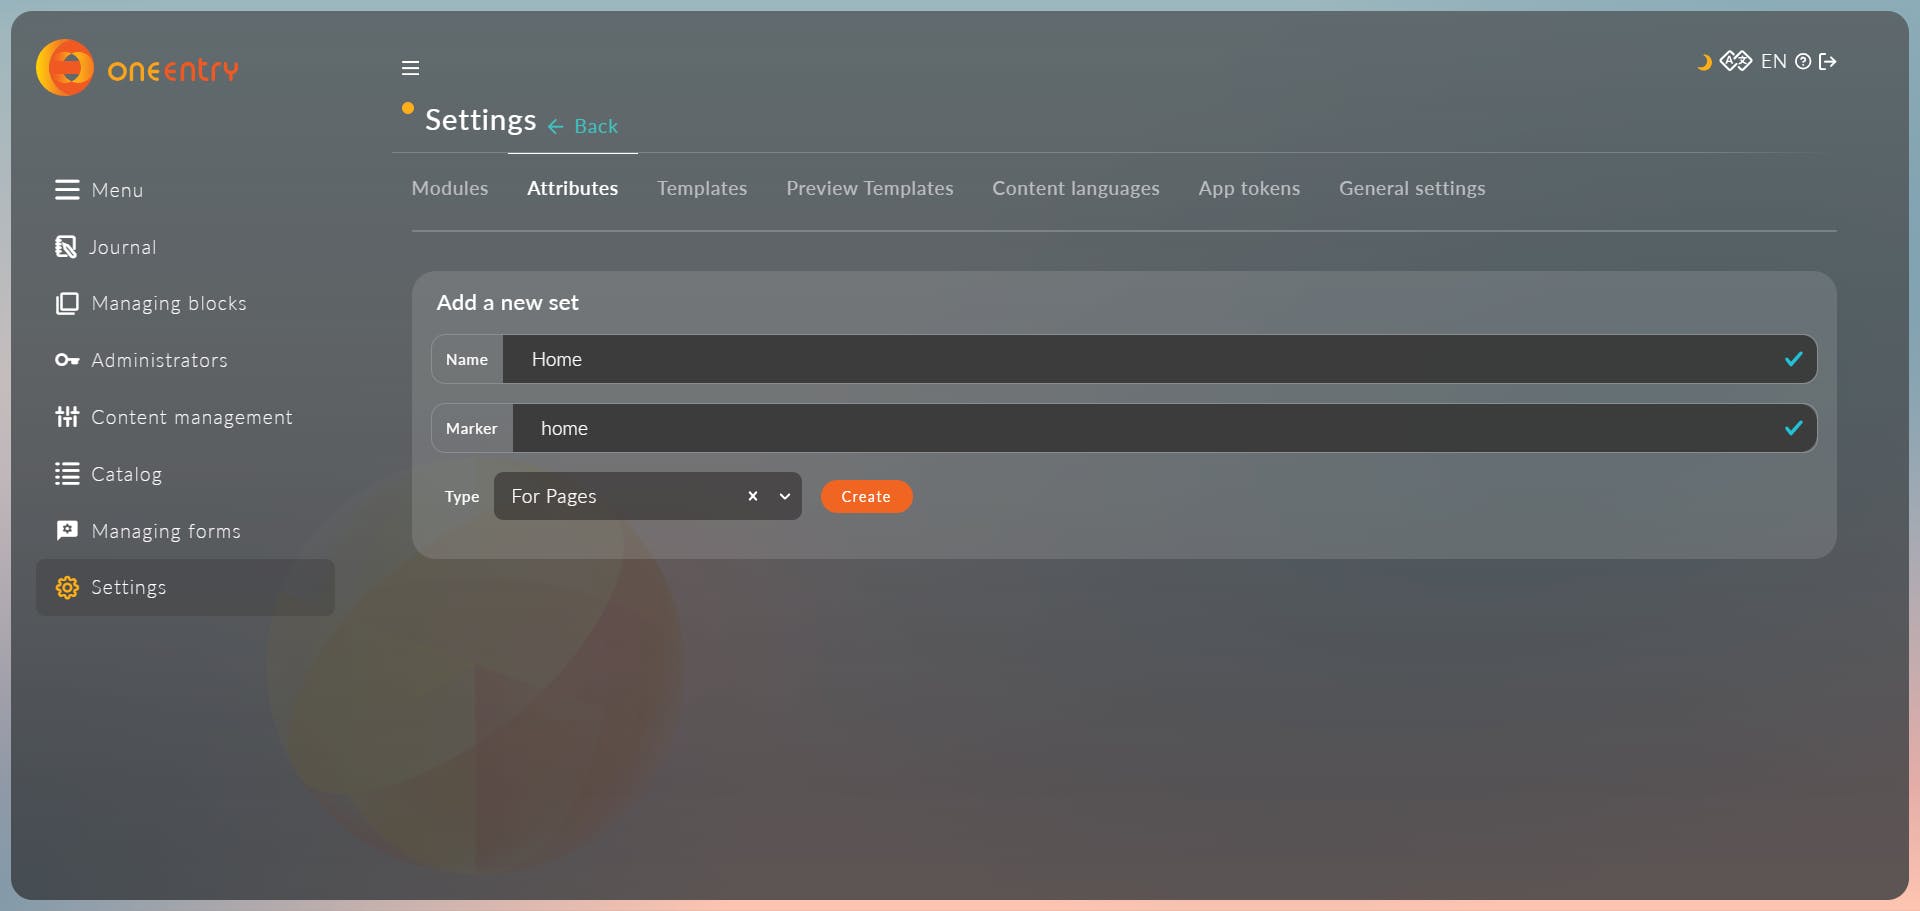
Once created, it will look like in the screenshot below:

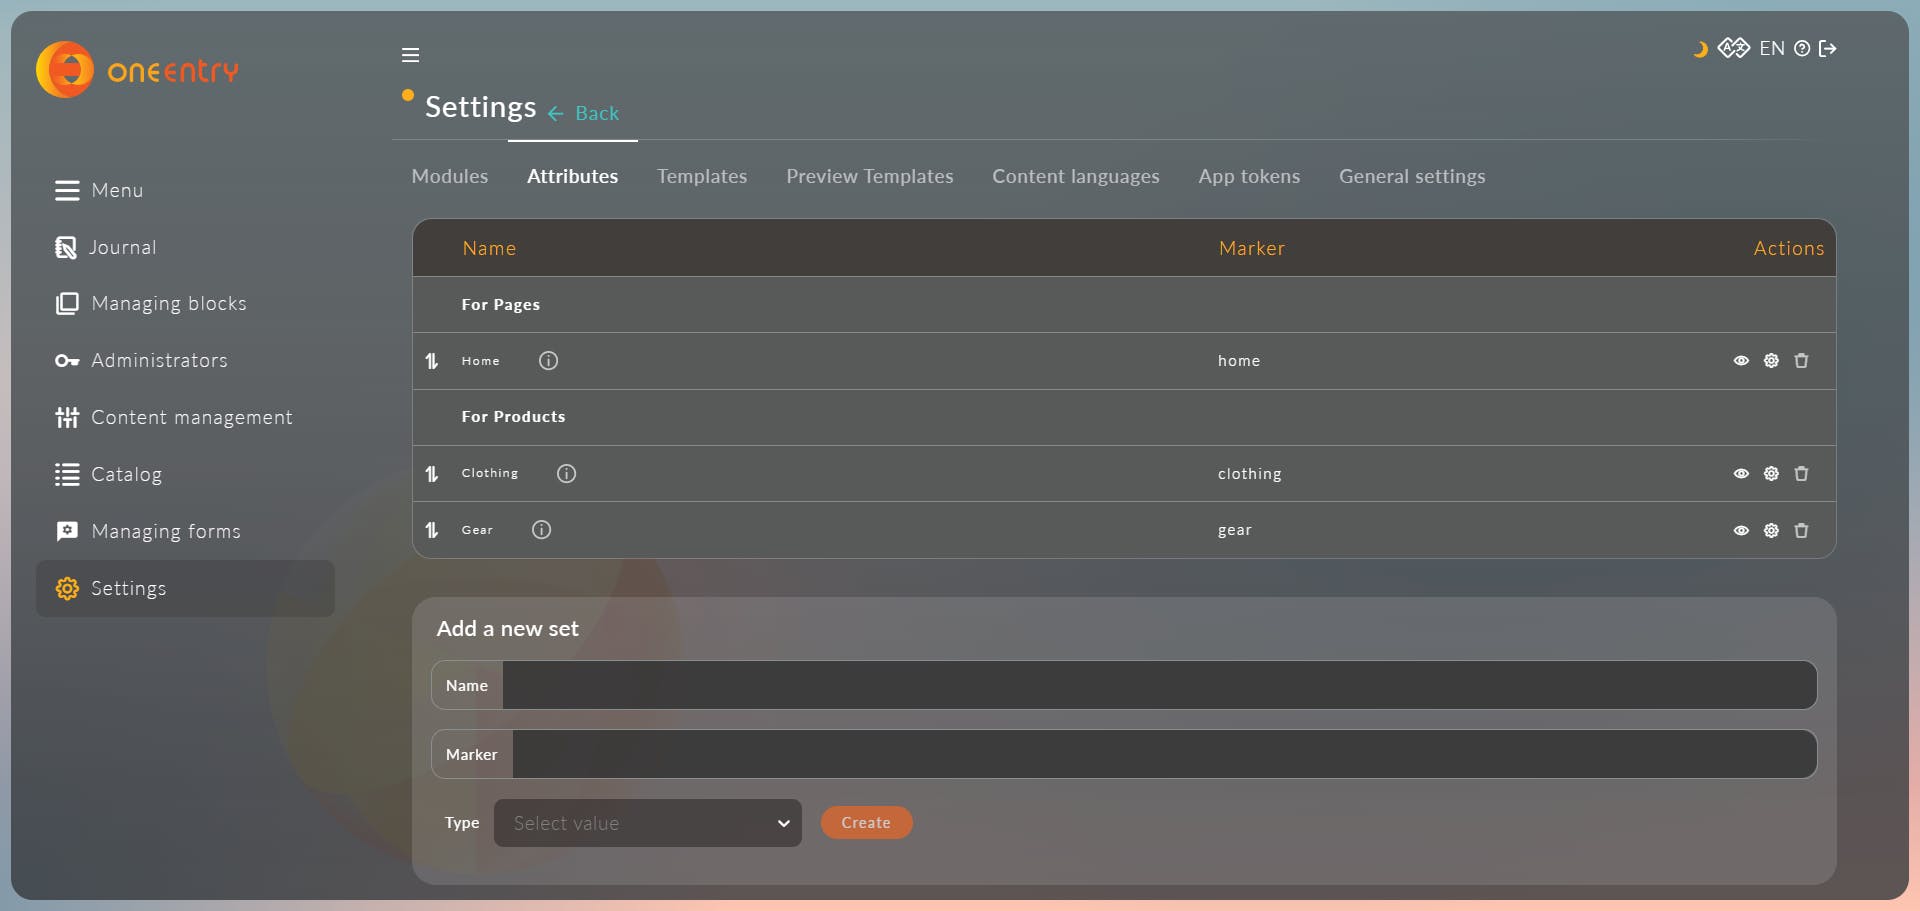
Similarly, let's create two separate attribute sets for the Clothing and Gear. Once created, the result should look like in the screenshot below.
Now let's define specific attributes for each set.
Based on the content we included in the Home section wireframe earlier we want to display the title, description, and image.
Click on the gear item for Home and create the following attribute names, markers, and attribute types as shown in the list below.

Now go back and click on the gear icon for Clothing.
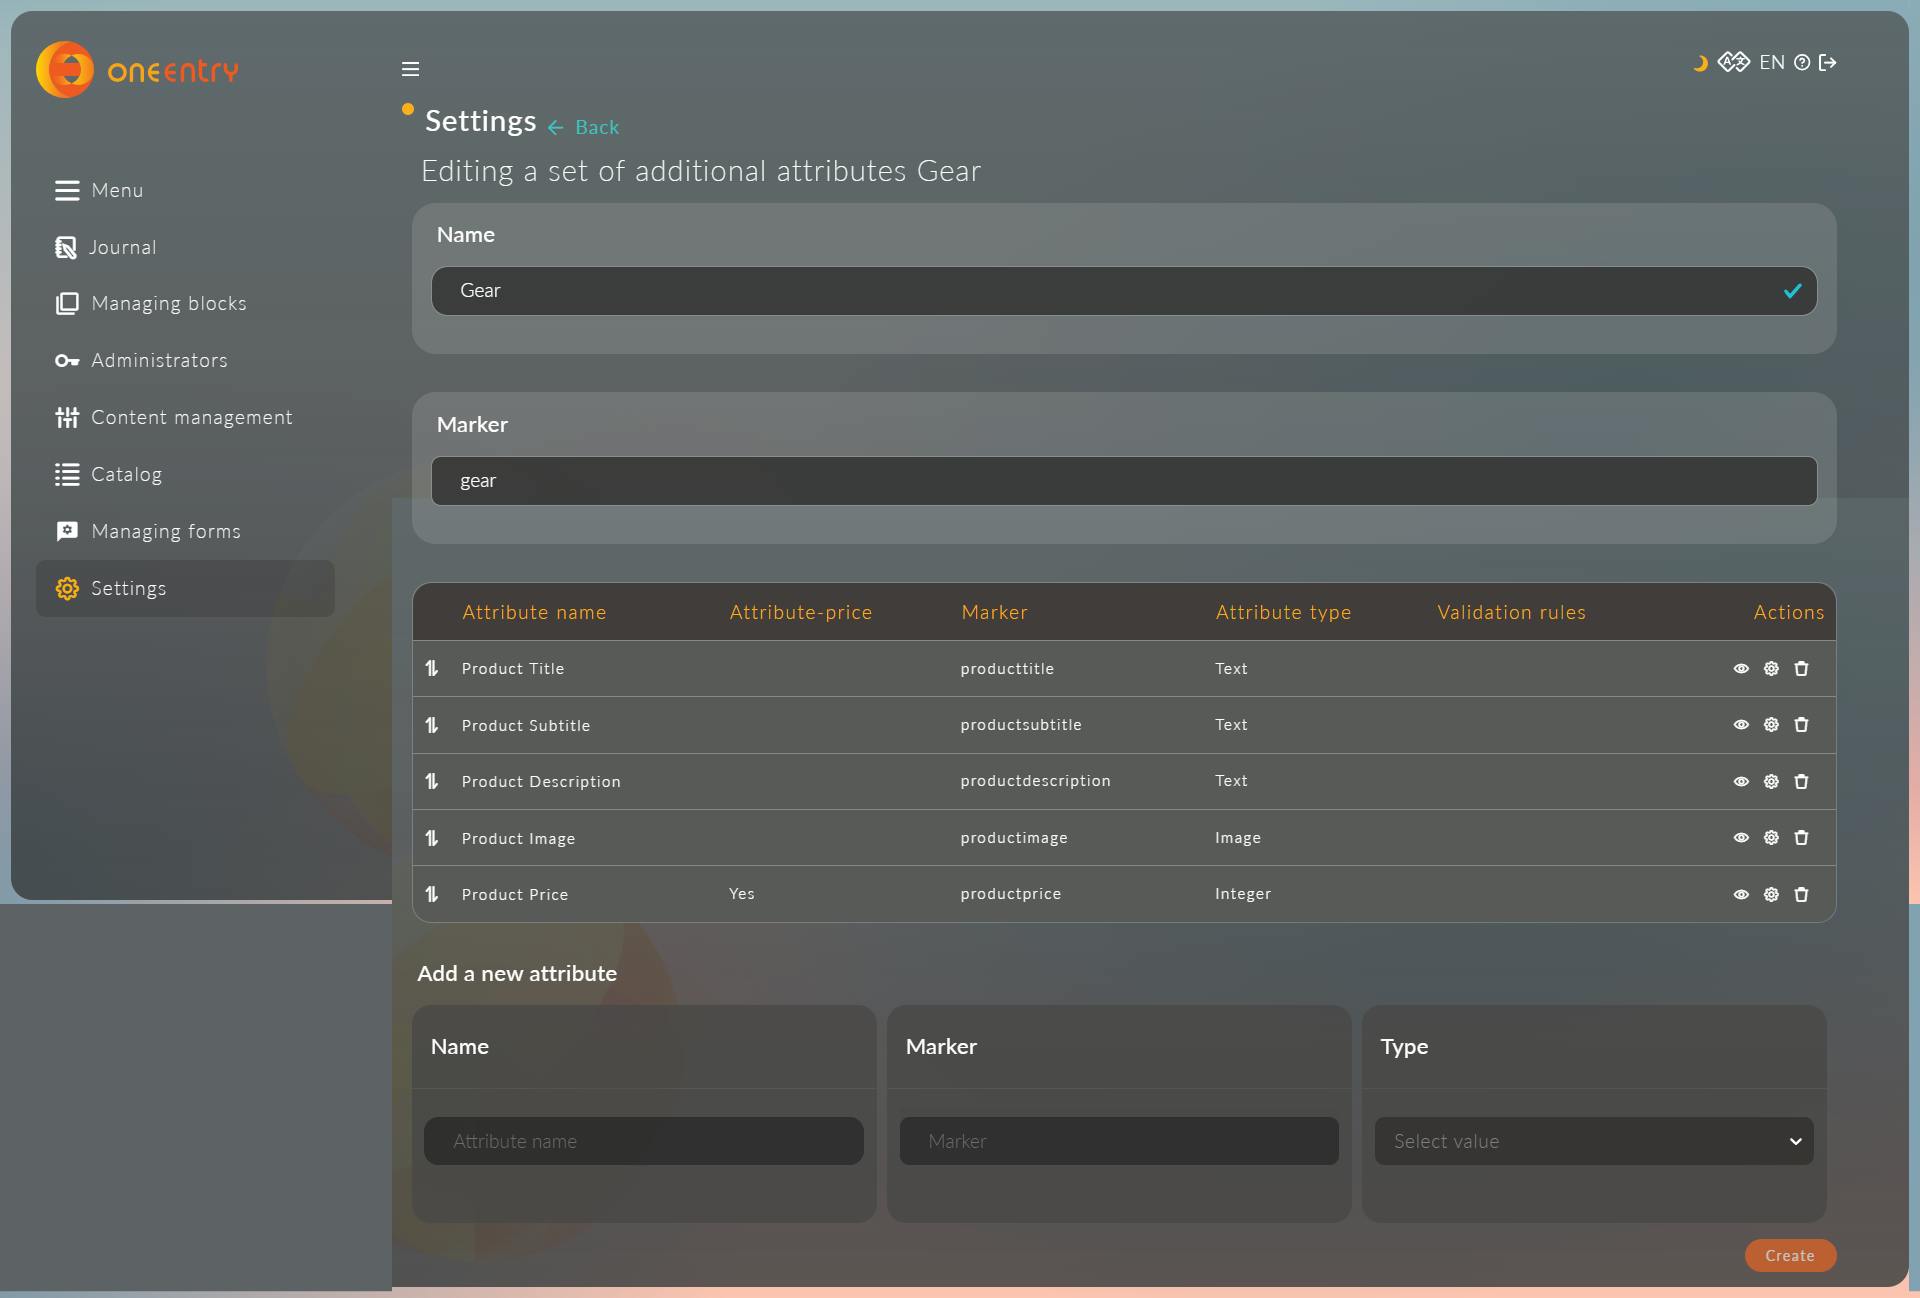
The attributes for this page will be a bit different since we want to display the product title, subtitle, description, image, and price.
Here is how the attribute structure would look:

Next, do the same for the Gear page, which will use the same structure:
Add content
At this stage of the project, we have already defined the content structure and are ready to start creating the content itself.
Navigate to the Content Management section where you previously created all your pages for the site:

Click on the edit button for Home. After that click on the Attributes tab on the Horizontal menu:
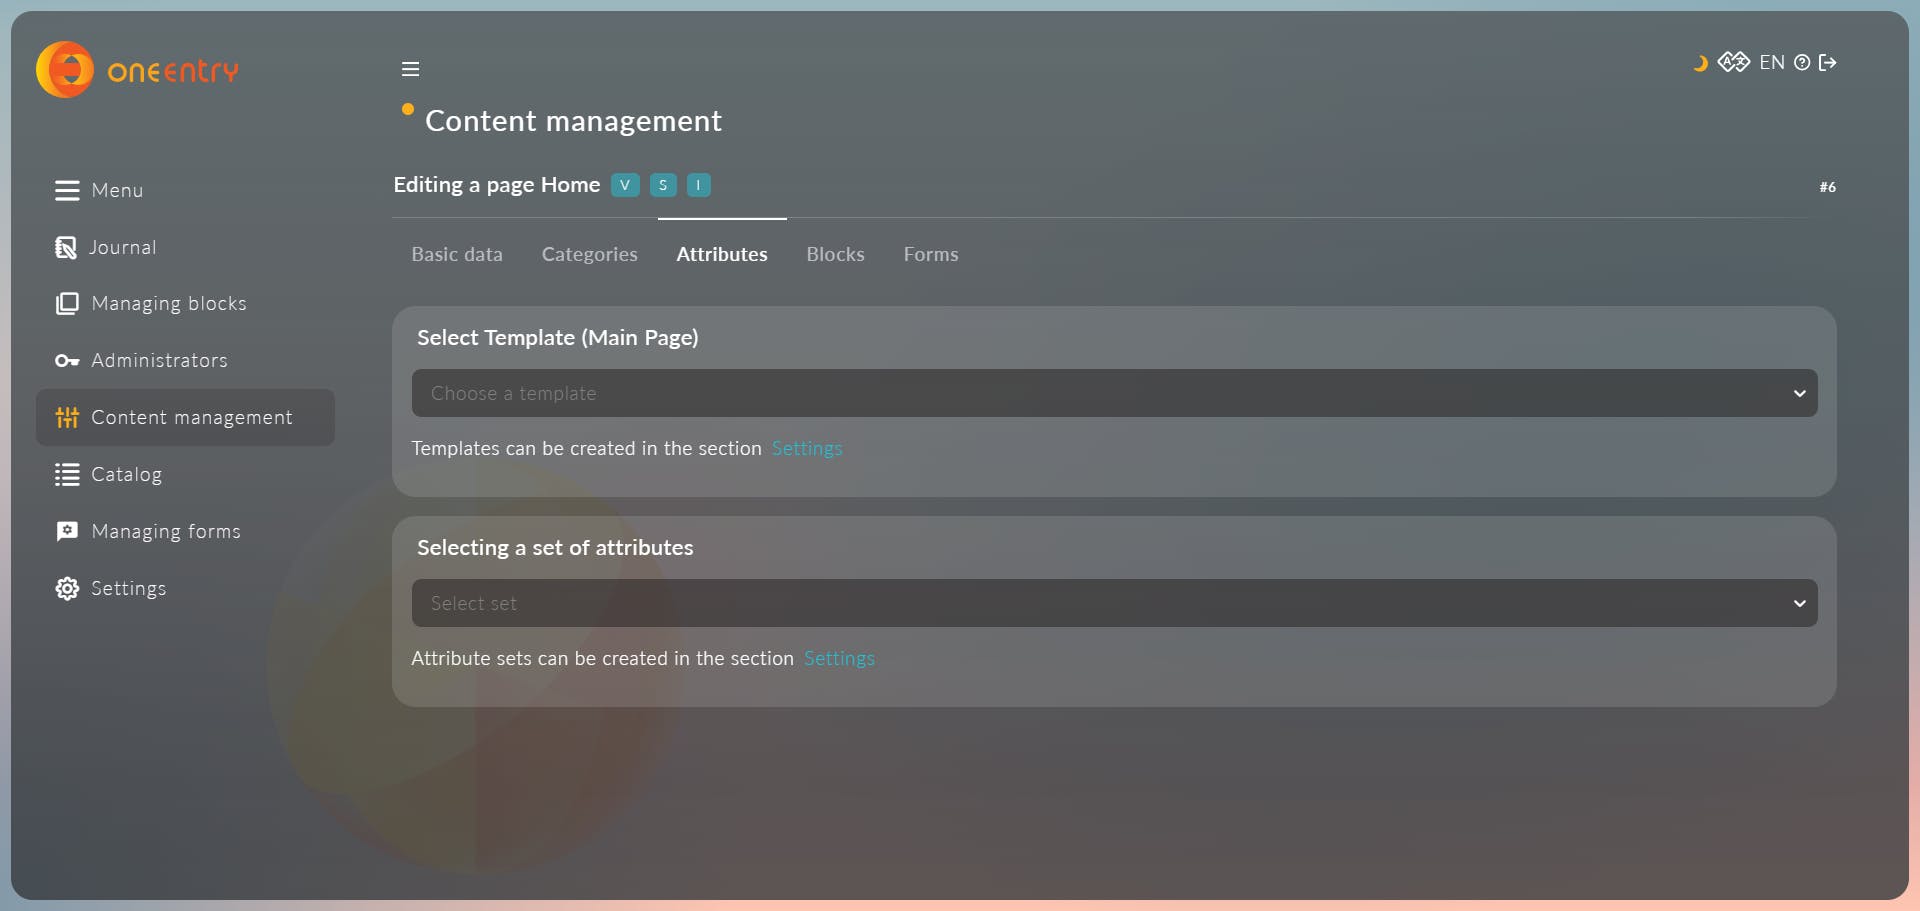
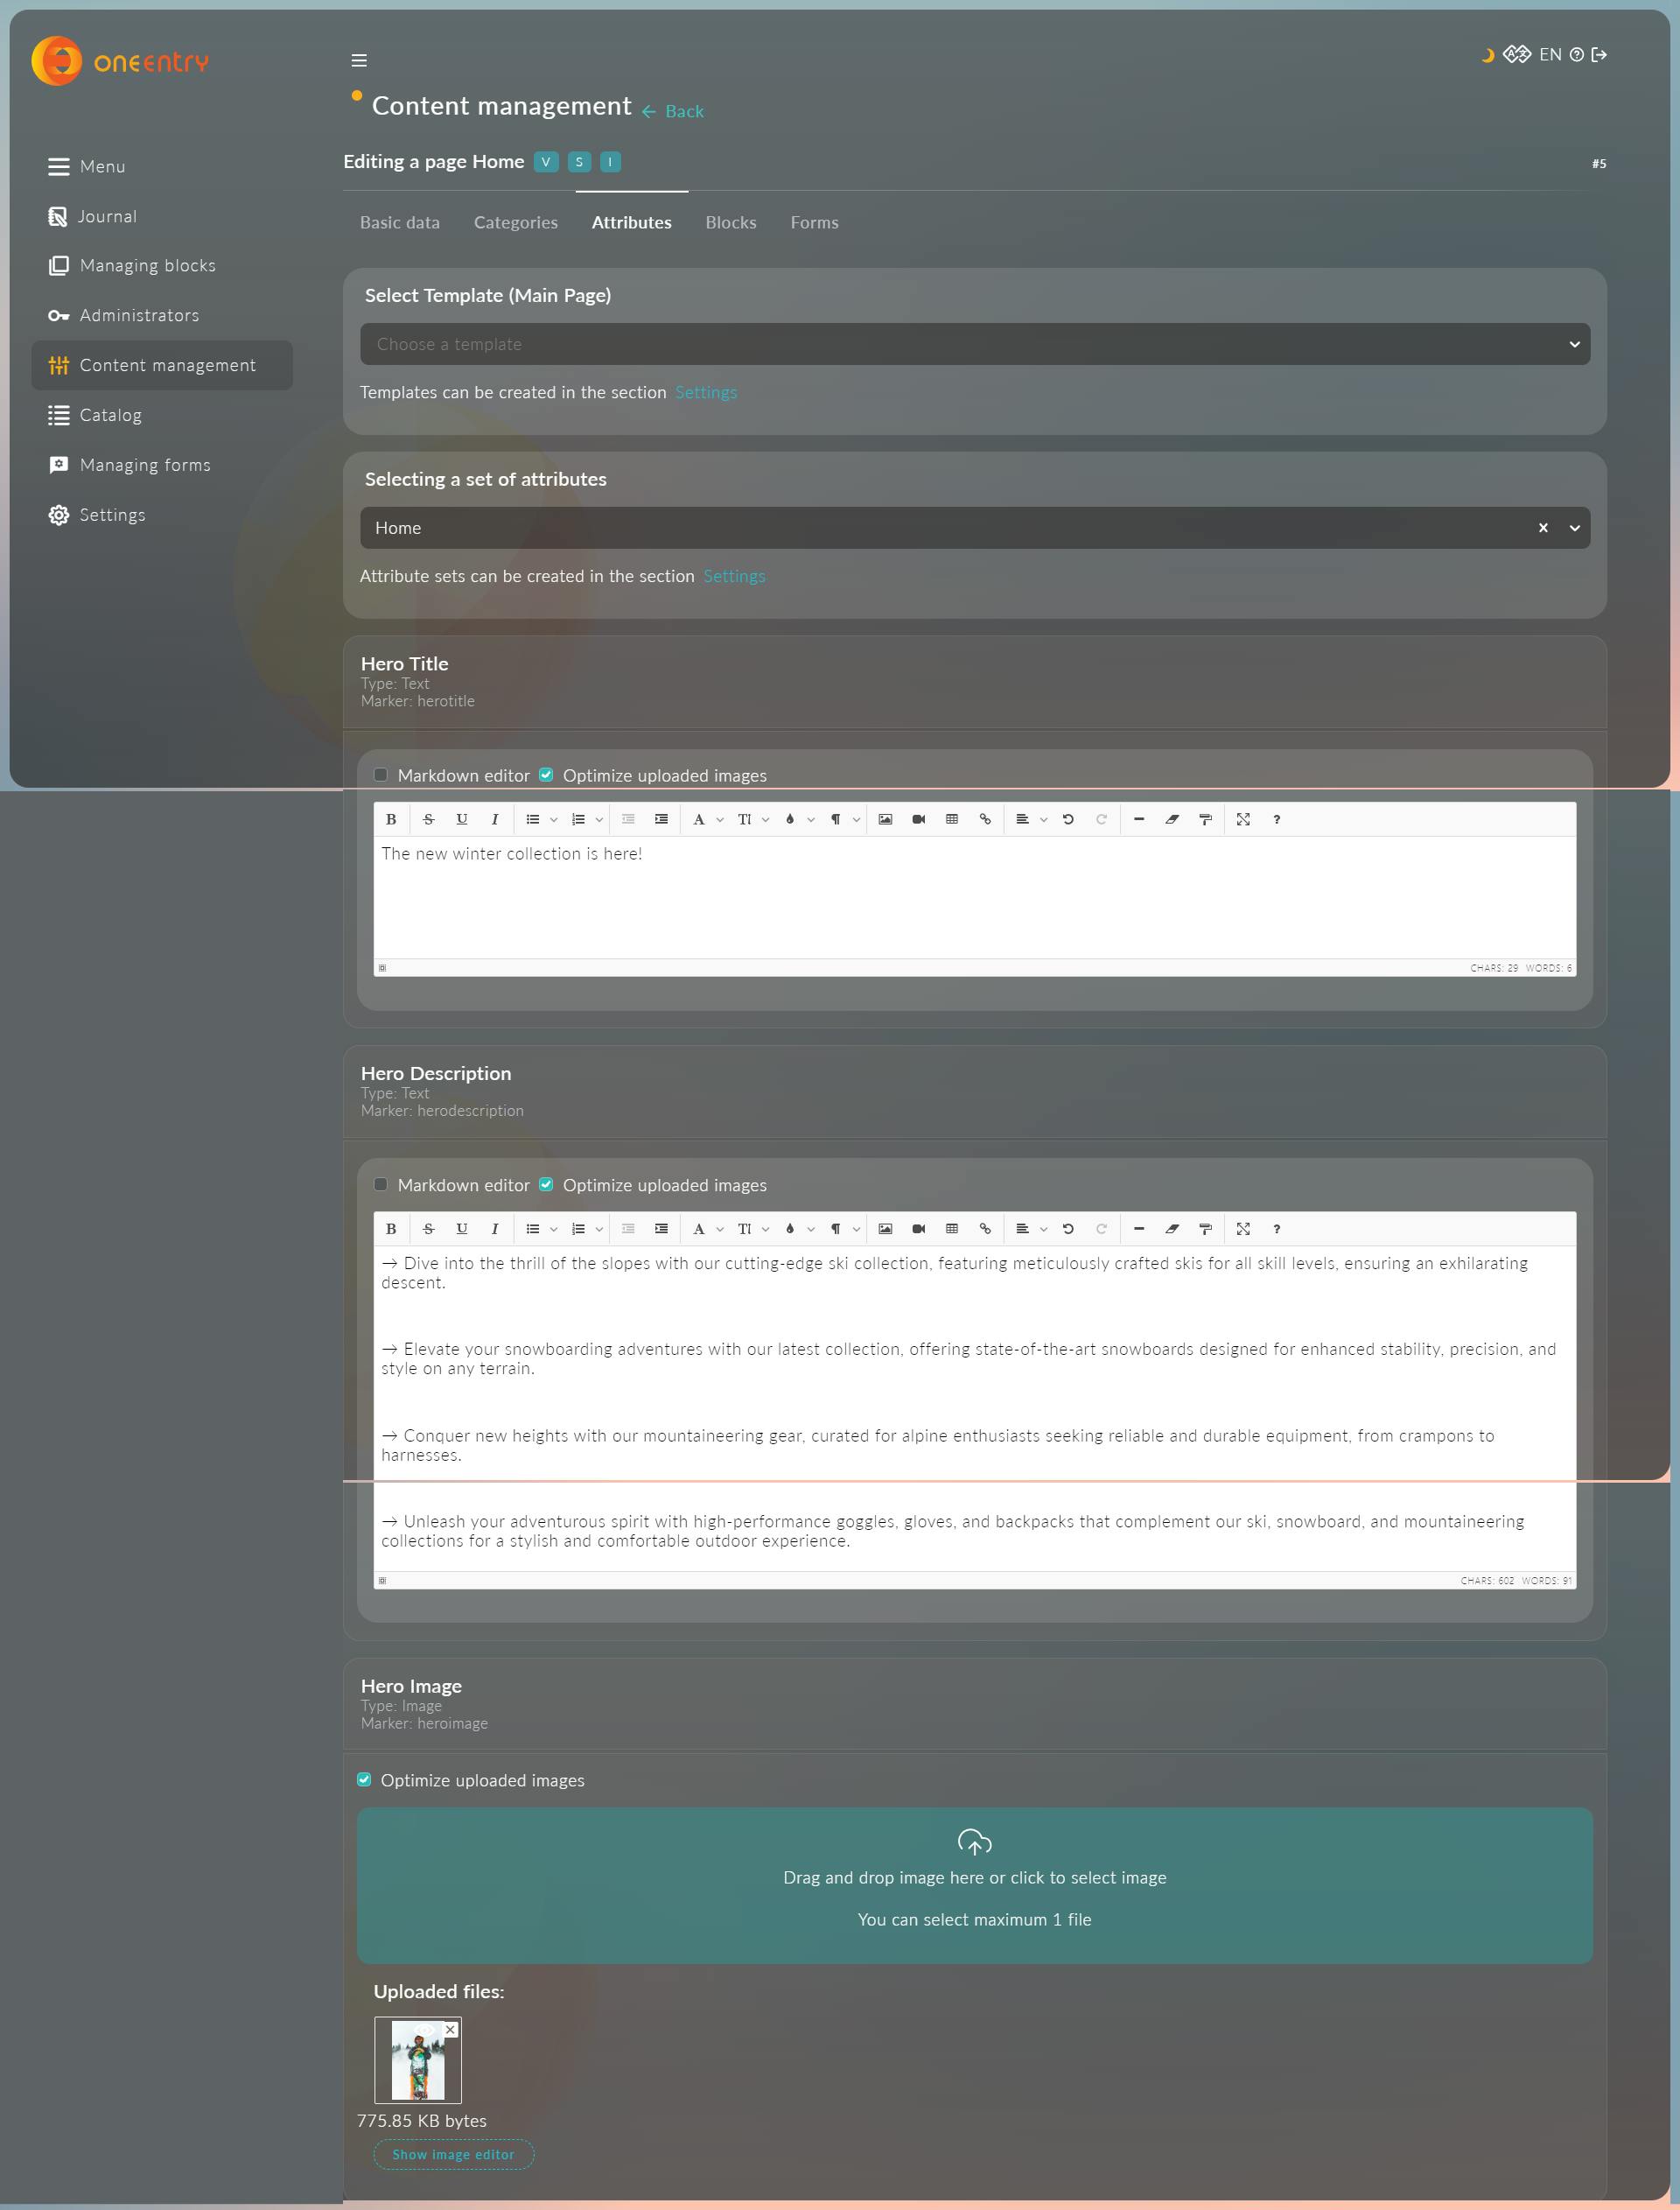
Select Home for the Set of attributes. That will load up all the attributes we created previously in Settings for the Home page.
Now fill in some sample data, which you want displayed on the Home page.
Now let's add some content for our Clothing and Gear pages.
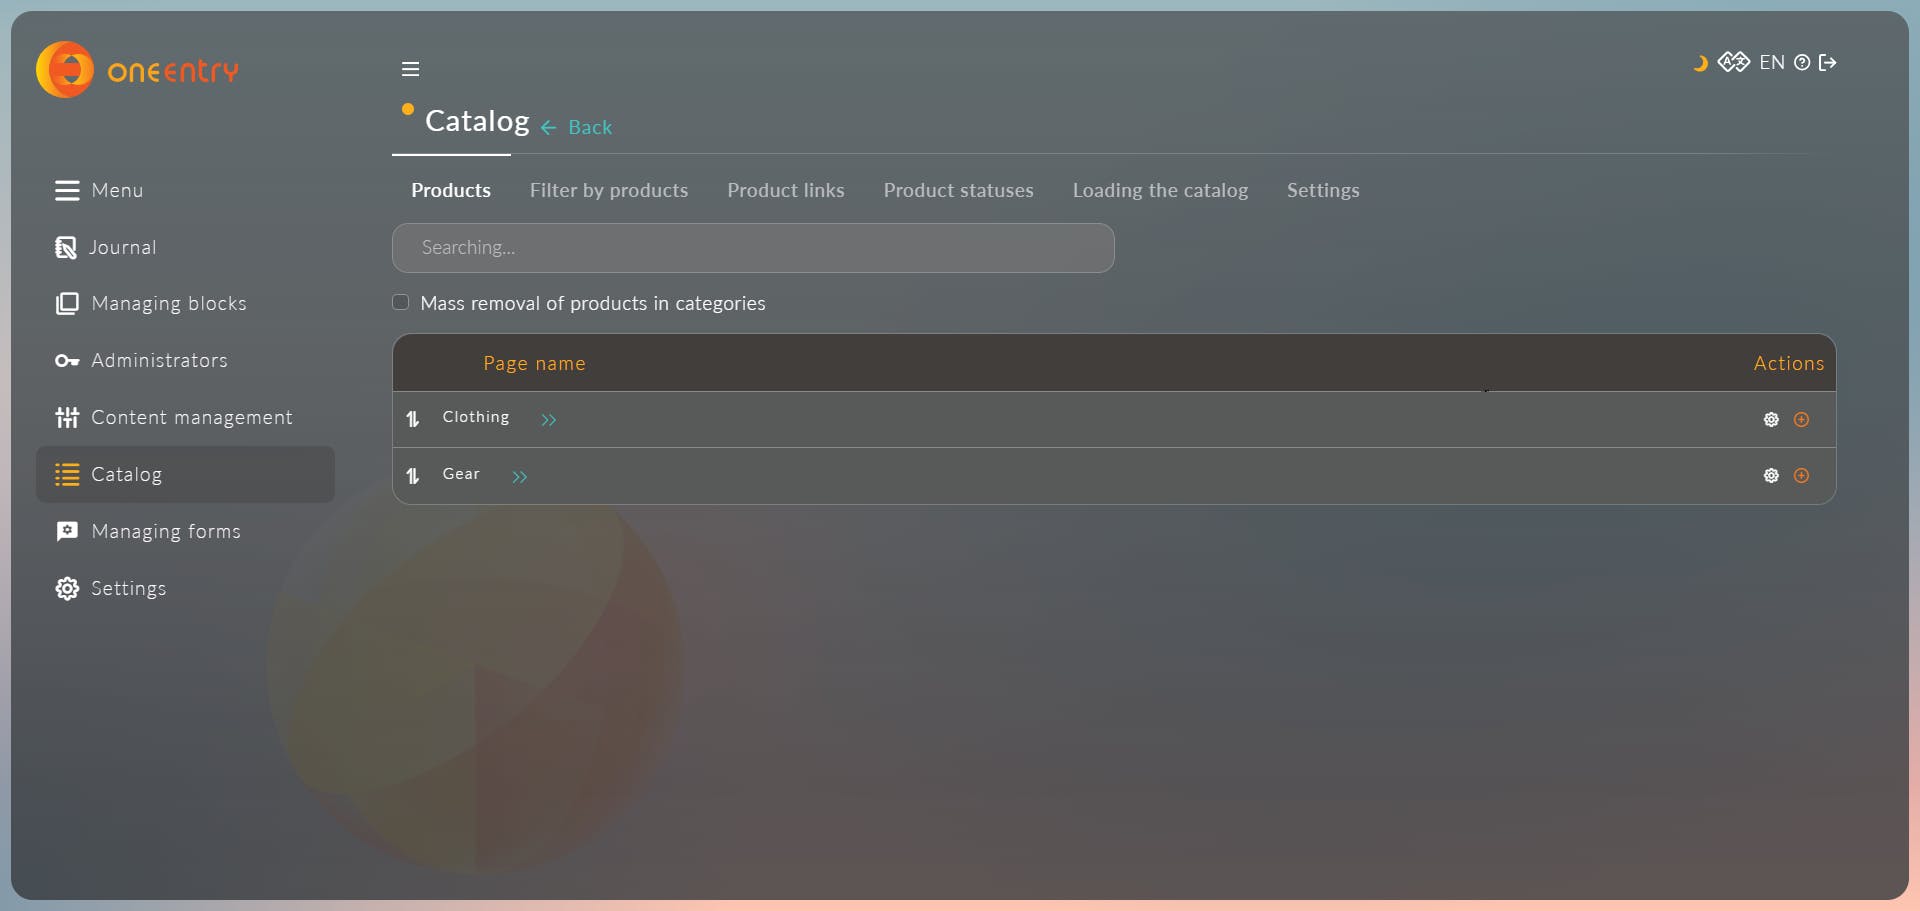
Since we selected the Page type as a Catalog, select Catalog from the left menu and both pages should be visible there:
Now click on the Add icon for Clothing and add a few items.
First, add the Header for the Product you want to add.

Now switch to the Attributes tab, select Clothing for the Set of attributes, and fill in the required data.

Go back to the Catalog menu and a few more items for both Clothing and Gear. For our demo app, I've added 4 items as shown in the screenshot below:

Create API access token
All of the data created in the OneEntry CMS is protected, so we will have to create a private token to be able to access it.
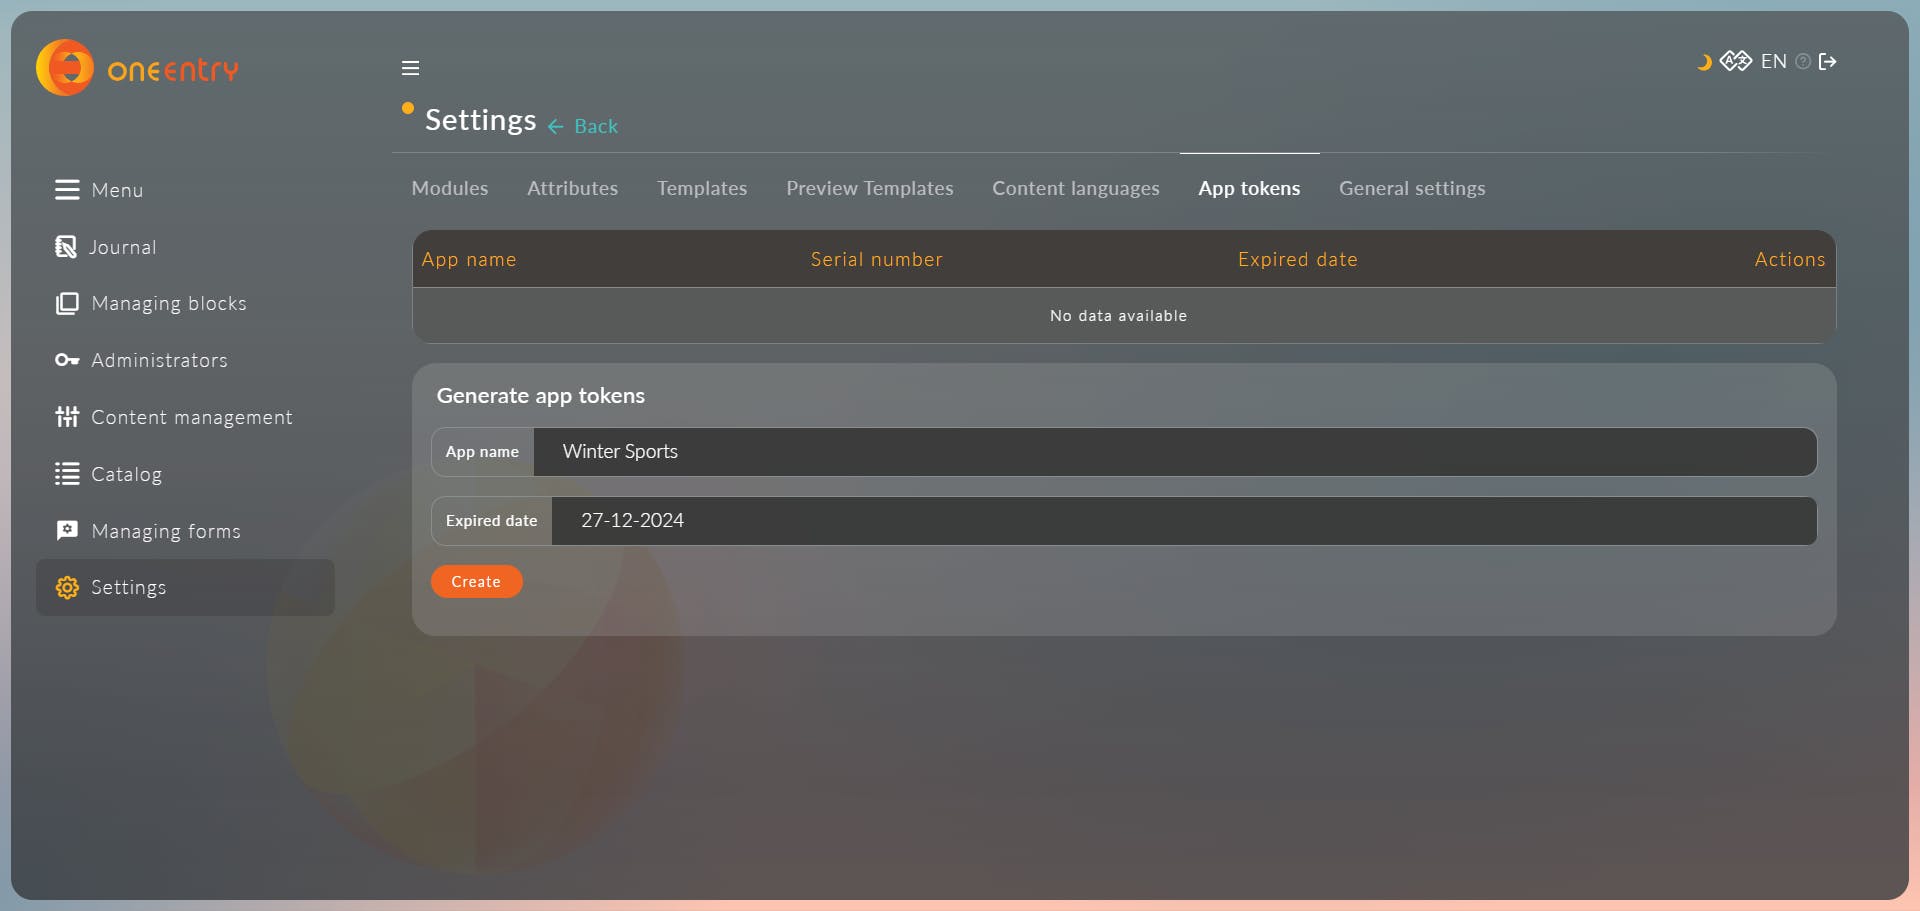
To do that, navigate to the Settings and select App tokens. Enter the app name and expired date and click Create. This will generate a unique API key.
Click the view icon in the action list and you will be able to see the key. Copy it to the clipboard since we will need it in the next section of the tutorial.

Setting up the NextJS project
In this section of the tutorial, we will start to work with the code and configure the NextJS project to work with OneEntry CMS.
Open the terminal and run the command npx create-next-app@latest.
The CLI will start the setup wizard. Enter the name of your project and select all the default values as shown below:
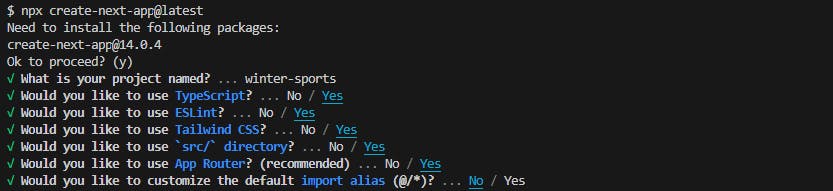
Give the setup a minute to complete and you will receive a notification when the NextJS app has been created.
After that change the directory to the newly created folder using the command cd winter-sports and then run npm run dev to start the developer server.
To access it click on the link provided on the terminal or open your web browser and navigate to http://localhost:3000 manually.
You should be presented with the NextJS developer server landing page:

Now, let's create an environmental value that we will need for our app. Switch back to your code editor and create a .env file at the root of your project.
Paste the API key you copied to the clipboard earlier as follows:
API_KEY=your-api-code-from-oneentry
This will allow us to access the key via process.env.API_KEY once we make the API calls to fetch the data from the OneEntry CMS.
We also need to configure NextJS, so it allows us to include the media from an external domain. We will need this to access images from OneEntry CMS.
Open the file next.config.js in the project root and edit it as follows:
const nextConfig = {
  images: {
    remotePatterns: [
      {
        hostname: "ecommerce.oneentry.cloud",
      },
    ],
  },
};

module.exports = nextConfig;
Finally, we will need to reset the Tailwind default styling for the app since we will write all the styles from scratch.
Open the globals.css file in the app directory that is located in the src folder and change the file content to the following:
@tailwind base;
@tailwind components;
@tailwind utilities;
Create Types
Since we will be working with TypeScript, we will need to define what data types we will be using in our application.
We could do this inside the pages and components, but to keep the code cleaner and avoid repetition, create a new folder interfaces within in the app directory. Create a file data.tsx inside the newly created folder and include the code:
export interface Product {
  id: string;
  category: string;
  title: string;
  subtitle: string;
  description: string;
  image: string;
  price: number;
}

export interface ProductAPI {
  id: string;
  attributeValues: {
    en_US: {
      producttitle: {
        value: { htmlValue: string }[];
      };
      productsubtitle: {
        value: { htmlValue: string }[];
      };
      productdescription: {
        value: { htmlValue: string }[];
      };
      productimage: {
        value: { downloadLink: string }[];
      };
      productprice: {
        value: number;
      };
    };
  };
}

export interface Page {
  pageUrl: string;
  title: string;
  description: string;
  image: string;
  localizeInfos: {
    en_US: {
      title: string;
    };
  };
}

export interface PageAPI {
  attributeValues: {
    en_US: {
      herotitle: {
        value: { htmlValue: string }[];
      };
      herodescription: {
        value: { htmlValue: string }[];
      };
      heroimage: {
        value: { downloadLink: string }[];
      };
    };
  };
}

export interface URLProps {
  params: {
    category: string;
    productId: string;
  };
}

export interface TextProps {
  className: string;
  text: string;
}
Products and Page data will both have types for their front-end rendering data structure and the response from the API via the fetch method.
Also, we defined the data types for the data from the URL parameters and Text renderer for the data received from the text input fields in CMS.
Create API fetch functions
Now, let's create some functions that we will use to communicate with OneEntry CMS to fetch the data for the pages and products.
Again, we could do this in each file, but to keep the code cleaner let's create a new folder services within the app directory with a file fetchData.tsx inside it:
export async function getPages() {
  const response = await fetch(
    "https://ecommerce.oneentry.cloud/api/content/pages",
    {
      method: "GET",
      headers: {
        "x-app-token": `${process.env.API_KEY}`,
      },
    }
  );
  return await response.json();
}

export async function getProducts(category: string) {
  const response = await fetch(
    `https://ecommerce.oneentry.cloud/api/content/products/page/url/${category}?limit=4&offset=0&langCode=en_US&sortOrder=DESC&sortKey=id`,
    {
      method: "GET",
      headers: {
        "x-app-token": `${process.env.API_KEY}`,
      },
    }
  );
  return await response.json();
}

export async function getProduct(id: string) {
  const response = await fetch(
    `https://ecommerce.oneentry.cloud/api/content/products/${id}`,
    {
      method: "GET",
      headers: {
        "x-app-token": `${process.env.API_KEY}`,
      },
    }
  );

  return await response.json();
}
The getPages function will fetch the data about all pages that we created in the OneEntry CMS.
The getProducts function will fetch the data for a specific collection of products based on the category parameter. We will pass the parameter when we import the function into the products page.
The getProduct function will fetch the data based on the id of the product we open. We will pass the parameter when we import the function into the preview page for any specific product.
Notice that we used the process.env.API_KEY to access the API key that we defined in the .env file earlier to authenticate the access for the OneEntry CMS.
Create helper functions
Also, while we are still in the services folder, let's create another new file inside it called helpers.tsx which will include small utility functions:
export function calculateTotal(items: { price: number }[]) {
  return items.reduce((total, item) => total + Number(item.price), 0);
}

export function boughtStatus(items: { id: string }[], id: string) {
  return items.some((item) => item.id === id);
}

export function cartIndex(items: { id: string }[], id: string) {
  return items.findIndex((item) => item.id === id);
}
The calculateTotal function will add up the prices of the products added to the cart and return the total value.
The boughtStatus will detect if the individual items in the preview route have already been added to the cart.
The cartIndex will detect the position of the item in the array, for the products that have been added to the cart.
Creating components
Navigate back to the app directory and create a new folder components inside it.
Open the newly created folder and include seven separate files in it: Header.tsx, Footer.tsx, Text.tsx, Card.tsx, Preview.tsx, Order.tsx, AddToCart.tsx.
Header component
Open the file Header.tsx and include the following code:
import Link from "next/link";
import { Page } from "../interfaces/data";

export default function Header({ pages }: { pages: Page[] }) {
  return (
    <div className="flex justify-between items-center mb-10 p-6">
      <Link href="/">
        <h1 className="text-xl">🏂 Alpine Sports</h1>
      </Link>
      <div className="flex space-x-4 list-none">
        {pages.map((page, index: number) => (
          <Link
            key={index}
            href={page.pageUrl === "home" ? "/" : `/${page.pageUrl}`}
          >
            {page.localizeInfos.en_US.title}
          </Link>
        ))}
      </div>
    </div>
  );
}
For the header, we displayed the company name and looped through the navigation links that we will get from the API once the component is imported into pages.
We created a two-column layout and positioned both elements at the opposite sides of the screen horizontally to achieve the typical navigation look.
Footer component
Open the file Footer.tsx and include the following code:
export default function Footer() {
  return (
    <div className="text-center mt-auto p-6">
      <h1>Alpine Sports, Inc.</h1>
      <p>All rights reserved, {new Date().getFullYear()}</p>
    </div>
  );
}
In the footer, we included the sample name for the company and the content rights with the current year. We centered the content and added some padding.
Text component
Open the file Text.tsx and include the following code:
import { TextProps } from "../interfaces/data";

export default function Text({ className, text }: TextProps) {
  return (
    <div className={className} dangerouslySetInnerHTML={{ __html: text }} />
  );
}
The Text component will render the text data that we receive from the OneEntry CMS and display it properly in our application without HTML tags.
Card component
Open the file Card.tsx and include the following code:
import Link from "next/link";
import Text from "../components/Text";
import { Product } from "../interfaces/data";

export default function Card({ product }: { product: Product }) {
  return (
    <Link href={`/${product.category}/${product.id}`}>
      <div className="group relative">
        <div className="group-hover:opacity-75 h-80">
          <img
            src={product.image}
            alt="Product card image"
            className="h-full w-full object-cover object-center"
          />
        </div>
        <div className="mt-4 flex justify-between">
          <div>
            <h3 className="text-sm text-gray-700">
              <Text className="" text={product.title} />
            </h3>
            <Text
              className="mt-1 text-sm text-gray-500"
              text={product.subtitle}
            />
          </div>
          <p className="text-sm font-medium text-gray-900">${product.price}</p>
        </div>
      </div>
    </Link>
  );
}
In the card component, we displayed the image, title, subtitle, and price for each product. We will map through all the items once it's imported into the pages.
The image will be displayed at the top of the card, followed by the title and description, and the price on the bottom right side of the component.
Preview component
Open the file Preview.tsx and include the following code:
"use-client";
import Image from "next/image";
import Text from "./Text";
import { Product } from "../interfaces/data";

export default function Preview({
  children,
  productItem,
}: {
  children: React.ReactNode;
  productItem: Product;
}) {
  return (
    <div className="flex mx-auto max-w-screen-xl">
      <div className="flex-1 flex justify-start items-center">
        <Image
          src={productItem.image}
          alt="Product preview image"
          width="450"
          height="900"
        />
      </div>
      <div className="flex-1">
        <Text className="text-5xl pb-8" text={productItem.title} />
        <Text
          className="text-4xl pb-8 text-gray-700"
          text={`$${productItem.price}`}
        />
        <Text
          className="pb-8 text-gray-500 text-justify"
          text={productItem.description}
        />
        {children}
      </div>
    </div>
  );
}
The preview component will be used to display further information about each product once the user clicks on it.
We will display the product image, title, price, and the description. The layout will be divided into 2 columns with the image being displayed on the left column and the rest of the content on the right.
Order component
Open the file Order.tsx and include the following code:
"use client";
import { useState, useEffect } from "react";
import Link from "next/link";
import Image from "next/image";
import Text from "./Text";
import { calculateTotal } from "../services/helpers";
import { Product } from "../interfaces/data";

export default function Order() {
  const [cartItems, setCartItems] = useState<Product[]>([]);

  useEffect(() => {
    const storedCartItems = localStorage.getItem("cartItems");
    const cartItems = storedCartItems ? JSON.parse(storedCartItems) : [];
    setCartItems(cartItems);
  }, []);

  return (
    <div>
      {cartItems.map((item, index) => (
        <div
          key={index}
          className="flex items-center border-b border-gray-300 py-2"
        >
          <div className="w-20 h-20 mr-12">
            <Image src={item.image} alt={item.title} width={80} height={80} />
          </div>
          <div>
            <Link
              href={`/${item.category}/${item.id}`}
              className="text-lg font-semibold"
            >
              <Text className="" text={item.title} />
            </Link>
            <Text className="text-gray-600" text={item.subtitle} />
            <p className="text-gray-800">Price: ${item.price}</p>
          </div>
        </div>
      ))}

      <div className="mt-4 text-end">
        <h2 className="text-xl font-semibold mb-8">
          Total Amount: ${calculateTotal(cartItems)}
        </h2>
        <button className="bg-blue-500 hover:bg-blue-700 py-2 px-8 rounded">
          Proceed to checkout
        </button>
      </div>
    </div>
  );
}
The order component will list all the items the user has added to the cart. For each item, the image, title, subtitle, and price will be displayed.
Once the component will be rendered, the app will access all the items currently in the cart, set them to the cardItems state variable, and render them to the screen via the map method.
The total amount of the rendered items will be calculated via the calculateTotal function, which we imported from the helpers.tsx file.
AddToCart component
Open the file AddToCart.tsx and include the following code:
"use client";
import React, { useState, useEffect } from "react";
import { boughtStatus, cartIndex } from "../services/helpers";
import { Product } from "../interfaces/data";

export default function AddToCart({
  category,
  id,
  title,
  subtitle,
  image,
  price,
}: Product) {
  const storedCartItems = JSON.parse(localStorage.getItem("cartItems") || "[]");
  const isPurchased = boughtStatus(storedCartItems, id);
  const indexInCart = cartIndex(storedCartItems, id);
  const [btnState, setBtnState] = useState(false);

  useEffect(() => {
    isPurchased && setBtnState(true);
  }, []);

  const handleButtonClick = () => {
    const updatedCartItems = [...storedCartItems];

    if (!btnState && !isPurchased) {
      updatedCartItems.push({ category, id, title, subtitle, image, price });
    } else if (isPurchased) {
      updatedCartItems.splice(indexInCart, 1);
    }

    localStorage.setItem("cartItems", JSON.stringify(updatedCartItems));
    setBtnState(!btnState);
  };

  return (
    <button
      className={`${
        !btnState
          ? "bg-blue-500 hover:bg-blue-600"
          : "bg-yellow-300 hover:bg-yellow-400"
      } py-2 px-8 rounded`}
      onClick={handleButtonClick}
    >
      {!btnState ? "Add to Cart" : "Remove from Cart"}
    </button>
  );
}
The addToCart component will be displayed on the individual product preview page and will allow the user to add the product to the shopping cart.
Upon the rendering, the the isPurchased function will detect whether or not the product has already been added to the cart before. If it's not the rendered button will display "Add to cart" otherwise it will say "Remove from cart".
The handleButtonClick function click feature will add or remove the product from the items array based on the above state accordingly.
Create pages
Finally, let's import the components we created in the previous section of the tutorial and create the page logic for the application.
Home page
Open page.tsx in the app directory and edit the content of it as follows:
import Image from "next/image";
import Header from "./components/Header";
import Text from "./components/Text";
import Footer from "./components/Footer";
import { getPages } from "./services/fetchData";
import { PageAPI } from "./interfaces/data";

export default async function Home() {
  const pages = await getPages();

  const getValues = (el: PageAPI) => {
    const { herotitle, herodescription, heroimage } = el.attributeValues.en_US;

    return {
      title: herotitle.value[0].htmlValue,
      description: herodescription.value[0].htmlValue,
      image: heroimage.value[0].downloadLink,
    };
  };

  const pageContent = getValues(pages[0]);

  return (
    <div className="flex flex-col min-h-screen">
      <Header pages={pages} />
      <div className="flex flex-row mx-auto max-w-screen-xl">
        <div className="flex-1">
          <Text
            className="text-6xl pb-10 text-gray-900"
            text={pageContent.title}
          />
          <Text
            className="text-xl pb-8 text-gray-500 text-justify"
            text={pageContent.description}
          />
        </div>
        <div className="flex-1 flex justify-end items-center">
          <Image
            src={pageContent.image}
            alt="Photo by Karsten Winegeart on Unsplash"
            width={450}
            height={900}
          />
        </div>
      </div>
      <Footer />
    </div>
  );
}
On the Home page, we will first call getPages function to get the data for the Header.
Then we use getValues function to fetch the Hero page data and then turn them into pageContent object for easier processing.
Then we render the imported Header and Footer components as well as pass the necessary values for the Hero title, description, and image.
Products page
Create a new folder [category] in the app directory and inside it - a file page.tsx.
The use of specific file names is important since that is what NextJS uses to handle routes and access URL parameters.
Include the following code in the page.tsx:
import Header from "../components/Header";
import Footer from "../components/Footer";
import Card from "../components/Card";
import { getPages, getProducts } from "../services/fetchData";
import { ProductAPI, URLProps } from "../interfaces/data";

export default async function Product({ params }: URLProps) {
  const { category } = params;
  const pages = await getPages();
  const products = await getProducts(category);

  const getValues = (products: ProductAPI[]) => {
    return products.map((el) => {
      const {
        producttitle,
        productsubtitle,
        productdescription,
        productimage,
        productprice,
      } = el.attributeValues.en_US;

      return {
        id: el.id,
        category: category,
        title: producttitle.value[0].htmlValue,
        subtitle: productsubtitle.value[0].htmlValue,
        description: productdescription.value[0].htmlValue,
        image: productimage.value[0].downloadLink,
        price: productprice.value,
      };
    });
  };

  const productItems = getValues(products.items);

  return (
    <div className="flex flex-col min-h-screen">
      <Header pages={pages} />
      <div className="mx-auto max-w-screen-xl px-8">
        <h2 className="text-4xl text-gray-900 mb-12">
          Browse our {category} collection:
        </h2>
        <div className="grid gap-x-6 gap-y-10 grid-cols-4 mt-6">
          {productItems.map((product) => {
            return <Card key={product.id} product={product} />;
          })}
        </div>
      </div>
      <Footer />
    </div>
  );
}
For the products page, we first get the category parameter from the URL, which we further pass into the getProducts function, to describe which category of the products we need to fetch based on which page of the site gets visited.
Once the data has been received, we create an array of objects productItems that consists of all the necessary attributes for the page for easier processing.
Then we loop through it via the map method and render it to the screen by passing props to the Card component which we imported from the component folder.
Preview page
Inside the [category] folder create another folder called [productId].
Open the newly created folder, and create a file page.tsx inside it with the code:
import Header from "../../components/Header";
import Preview from "../../components/Preview";
import AddToCart from "../../components/AddToCart";
import Footer from "../../components/Footer";
import { getPages, getProduct } from "../../services/fetchData";
import { ProductAPI, URLProps } from "../../interfaces/data";

export default async function Product({ params }: URLProps) {
  const { category, productId } = params;

  const pages = await getPages();
  const product = await getProduct(productId);

  const getValues = (el: ProductAPI) => {
    const {
      producttitle,
      productsubtitle,
      productdescription,
      productimage,
      productprice,
    } = el.attributeValues.en_US;

    return {
      id: el.id,
      category: category,
      title: producttitle.value[0].htmlValue,
      subtitle: productsubtitle.value[0].htmlValue,
      description: productdescription.value[0].htmlValue,
      image: productimage.value[0].downloadLink,
      price: productprice.value,
    };
  };

  const productItem = getValues(product);

  return (
    <div className="flex flex-col min-h-screen">
      <Header pages={pages} />
      <div className="flex mx-auto max-w-screen-xl">
        <div className="flex-1 flex justify-start items-center">
          <Preview productItem={productItem}>
            <AddToCart
              id={productId}
              category={category}
              title={productItem.title}
              subtitle={productItem.subtitle}
              description={productItem.description}
              image={productItem.image}
              price={productItem.price}
            />
          </Preview>
        </div>
      </div>
      <Footer />
    </div>
  );
}
This page will allow users to view more details for any individual product once they click on their cards on the products page.
We first get the productId parameter from the URL, which we further pass into the getProduct function, to specify which product we need to fetch based on which product gets viewed on the preview page.
Once the data has been received, we create an object productItem that consists of all the necessary attributes to be passed into the Preview component as props.
We also get the category parameter, since we need to pass it to the Add to Cart component, so we can create a valid link for the item in the Cart page.
Cart page
Finally, create a new folder cart in the app directory.
Open it, create a new file page.tsx inside it with the following code:
import Header from "../components/Header";
import Order from "../components/Order";
import Footer from "../components/Footer";
import { getPages } from "../services/fetchData";

export default async function Cart() {
  const pages = await getPages();
  return (
    <div className="flex flex-col min-h-screen">
      <Header pages={pages} />
      <div className="container mx-auto max-w-screen-xl px-8">
        <h2 className="text-4xl text-gray-900 mb-12">Shopping cart summary:</h2>
        <Order />
      </div>
      <Footer />
    </div>
  );
}
We first fetched the necessary data and then passed it into the Header as the props.
Then we rendered the Header component with the navigation, the Order component that will list all of the items the user has added to the cart, and also the Footer component with the company name and the copyright information.
Testing
Congratulations, you have made a working project!
First, check if the developer server is still running. If it's not, run the command npm run dev to start it again and access localhost:3000 to view it.
Your project should now look like this:

As you can see, the Home section content has been successfully fetched from the Home attributes set that we specified in the data fields.
Also, all the items from the OneEntry CMS catalog have been fetched in the Clothing and Gear sections with all the information properly rendered.
Users can also preview each product separately on its dedicated page, thanks to NextJS route handling and product parameters.
Also, all the functions and events work as expected and the user can add and remove the items from the shopping cart, with the total being calculated.
Conclusion
In this tutorial, we created an eCommerce project that allows users to create, update, and delete website pages and their content as well as easily manage products with an easy-to-use catalog interface, thanks to OneEntry CMS.
The code is available on GitHub so feel free to clone it and add more functionality to it to suit your needs. You could add more menu sections to it, extend individual components, or even add more components to implement new features.
Hopefully, this will be useful to you and you get an insight into how to use OneEntry CMS as a backend solution, how to pair it with the front end of your application, and how to use the best features of NextJS, Typescript, and Tailwind.
Make sure to receive the best resources, tools, productivity tips, and career growth tips I discover by subscribing to my newsletter!